| Author |
Message |
scottyellow67
Samba Member

Joined: September 25, 2010
Posts: 316
Location: Indiana, PA

|
 Posted: Sun Feb 09, 2014 5:06 pm Post subject: Installing a narrowed beam (BJ) step by step (lots of pics) Posted: Sun Feb 09, 2014 5:06 pm Post subject: Installing a narrowed beam (BJ) step by step (lots of pics) |
 |
|
Before I even bought any parts I searched through hundreds of threads to try and determine what "stance" I was looking for. Looking through the wheel/tire combo thread over and over again helped me decide that I wanted a 4" narrowed beam with drop spindles.
After I made that decision I looked even further to try and determine if it was a job I wanted to tackle myself. I am not a mechanic, but I am a mechanical person. I have warm garage and some tools and more car restoration experience than the average guy, but way less than many others.
I also own the blue "Bently" book and find it very valuable.
I love to read about and see others peoples projects..especially the ones that show photos of step by step progress on builds. I was hoping to find a similar thread that could walk me through my attempt. I didn't really find one that would run start to finish with out being side tracked, or was riddled with side conversations, insults from guys who feel superior, or redirects or attempts by some to try and make the "poster" NOT move forward with their plans.
I decided to try and document the procedure so maybe one day another hobbyist like myself could benefit. Im sure I didn't do everything exactly as someone else may have.
I hope that if you see something I have done that is down-right wrong or dangerous you comment respectfully about it.
This project cost me about $700 but I have retained all my orig parts (in the event that I decide to reverse it). If I decide that I like the outcome and the changes in handling it causes, I should be able to sell the old parts to reduce the amount I attribute to the transition.
Here goes...
My car is a 66 sedan. The PO had installed a stock width adjustable beam with the stock spindles. It didn't look bad. It just wasn't what I had in mind.
My orig stance...
A note about safety. I had my car on car dollies so that I can push it into the corner when I wasn't working on it. This project took me about 4 weekend evening sessions working at a slow pace while watching TV and having a beer. I found some very solid EWP blocks from my work and was able to set the car at a workable height and maintain my flexibility to move it to the corner when I was on a break.
My first step was to remove the gas tank and plug the fuel line.
Then remove the front wheels...
The sway bar needs to be removed. I wasted a lot of time on my first bug restoration by trying to surgically remove these clamps only to find they looked like crap. I ended up buying new ones for that car. My narrowed beam will probably not permit the use of a sway bar, so I simply cut through the center of the clamp clip to take them off...Took about 45 seconds to do all 4.
Ill keep the sway bar in the event that I either want to go back to stock width or sell this piece later.
I removed the front drums by taking off the dust cover (pried them off with a screwdriver) loosening the allen bolt and the retaining nut (don't forget that the drivers side is left hand threads). The drums slide right off. You may need to back your brake pad adjusting star off to allow the drum to slip right off.
There are three bolts that hold the backing plate and the brake assemblies to the spindle. Remove the three bolts and take it out and away from the spindle. You do NOT need to remove the brake lines. I just used a piece f wire to hang the assembly out of the way.
Next, you will need to separate the steering column from the steering box. Here is what it looks like...
Pull the horn wire off the connector at the coupler...
The steering coupler fastens the column to the steering box with 4 bolts. You only need to remove two of them.
Once the two bolts are removed-grab the steering wheel and pull up and away. You may need to loosen the bolts that fasten the column to the underside of the dash. Once I pulled it away enough to give me some room to work under the hood, I used another piece of wire to hold it out of the way.
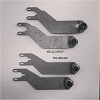
I bought this tie rod tool. DEFINITELY get one. Advance auto had it for $14.00. It makes removing old tie rods a snap!!
Take out both tie rods and the steering stabilizer.
Next, you need to get the spindle assemblies off of the torsion arms. I stuck an old screwdriver through the tie rod hold to keep everything from spinning around while I broke the ball joint nuts loose.
Remove the spindles. The tie rod tool worked here too.
Now the spindles are removed from each side. Note the angle of the torsion arms.
Torsion arms come out next. Loosen the base nut then the allen headed grub screws.
Pull the arms straight out. The leaf springs will stay inside the tubes. the grub screws is what holds the arms in place.
All 4 arms are now out-you can see the springs sticking out of the tubes...
Next, I removed the 4 large bolts that hold the beam to the frame. I had to use a longer breaker bar to get these loose...
I placed my floor jack under the beam to support it while I moved to the next step..
There are two bolts that go down through tabs in the body and into the top of the beam. They are the last two items that are holding the beam in place.
Remove them...
Lower the beam out and pull out from under the car. The beam is out!
I built a temporary support structure for the new beam. this way I can assemble it with out it flopping all over the place...It gets pretty heavy..
I bought this beam from Derek at the DubLab. Seemed like a great guy. Order shipped when he said it would. Took about two weeks. I got my new narrowed springs and tie rods and ends from him too.
Insert the narrowed springs into the beam. Dub Lab had them labeled top and bottom for me. Be sure to orient them correctly. The dimples go up on the drivers side and down on the passenger side.
I had to get new ball joints as well. I grabbed these from JBugs. The long ones are for the bottoms. Be sure to get the ones made for a lowered application.
I had my mechanic at work press out the old BJ's and install the new ones in my arms. He had a press there, it took him about 10 minutes. Unless you have the tool, you may be just as far ahead to take them to a shop to have this done.
Insert the plastic bushings into the new beam. I got these from DubLab too. Sorry no pic. They slide right in.
Insert the arms (with the new BJ's) into the beam.
You will re-use the steering box from your old beam. DubLabs beam does not have a locating stud on it. No problem. I just measured its location on my old beam in relation to the center of the body bolt mounting hole and installed it on the new beam in the same location.
Use the original clamp. The notches are what was used to locate the box on the orig beam.
My new beam didn't have grease fittings. I drilled and tapped for them and installed them next.
Put the new spindles on the new ball joints.
Then I painted the beam assembly...
Now, I didn't have my camera in the garage for the next few steps, and I was too lazy to come in and get it.
I re installed the new beam in my car. It was challenging to do by myself but my floor jack and a piece of rope made it manageable. I also installed a some shims between the beam and the frame (from Jbugs).
Re install the body mount bolts from the top.
Then I re installed the backing plates to the new spindles...
I was excited to reinstall the drums and put the wheels back on to set it on the floor to see how it looked. I realized that the orig inner bearings would not fit on the new spindles! They would only slip on this far...
After some help from Samba, I realized that the new spindles required a bearing from a 1979 model car. Two trips to Advance later, I got the correct inner bearings..
The orig outer bearings were in great shape and were the correct size. I re-used them.
Re install the tie rods and steering damper.
The new tie rods fit the the dropped spindles perfectly. The ends that connect to the steering box didn't. I simply drilled the arm on the steering box so the new tie rods fit.
I purchased so shocks to be used with a lowered car. Here is a pic of the shock.
I have the beam UP as high as it will adjust, but these shocks did not fit. They seemed to be about an inch too short. After wrestling with that idea for a while, I checked my old shocks. They would fit and still allow some travel. I re installed the old shocks. Not sure what I will do with these short ones. Maybe Ill sell them on Samba.
If any of you see where I went wrong here, please let me know. I could not extend the new shocks far enough to get a nut on the threaded end above the shock tower on my new beam.
Next, I enlisted the help of my son (Pickle) and his beagle(and my avatar) (Bella) to fill the tubes of the beam with grease.
I set the car back down on the floor. Here is my new "inset"..
This is the new stance from the drivers side. I love it!!
...and the passenger side...
A front end alignment is definitely in order. I got it close by measuring from the center of the tire on one side to the other. First at the font of the tires, then at the back of the tires. Adjust the tie rods ends until these measurements match. I will take it to a pro for that when the snow melts.
All in all. The job was not too difficult. Just remember to walk away and calm down when you get frustrated and/or smash a finger.
Let me know your thoughts.
My next challenge will be to lower the rear a spline. If any of you have seen a step by step on that procedure, please hook me up with a link.
Thanks for looking. Scott
Last edited by scottyellow67 on Sun Feb 09, 2014 7:09 pm; edited 1 time in total |
|
| Back to top |
|
 |
Glenn 
Mr. 010

Joined: December 25, 2001
Posts: 80608
Location: Sneaking up behind you
|
| Posted: Sun Feb 09, 2014 5:10 pm Post subject: |
|
|
I added it to the Sticky/FAQS.
Thanks for documenting this for others.
_________________
Glenn
74 Beetle Specs | 74 Beetle Restoration | 2180cc Engine
"You may not get what you pay for, but you always pay for what you get"
Member #1009
#BlueSquare
עַם יִשְׂרָאֵל חַי |
|
| Back to top |
|
|
VOLKSWAGNUT
Fastest VW Belt Changer

Joined: October 14, 2007
Posts: 11225
Location: Flippin' a Belt........ .... Off-n-On ... NC USA
|
| Posted: Sun Feb 09, 2014 5:23 pm Post subject: |
|
|
This is a very decent photo documentation....but change the title to BALL JOINT BEAM...as Link Pin Beams...have a few more critical steps....
Plus add.... alignment to follow installation
_________________
aka Ken {o\!/o}
Its your vehicle- stop askin' for approval-do what YOU like for cryin' out loud
Better to roll em' how you want and wear em' out-than lettin' em' rot out
Its about the going not the showing
Rebuilt to drive not decorate
WANTED: Local Eatin' Joints, Triple D for TheSamba contributions here http://www.thesamba.com/vw/forum/viewtopic.php?t=570510
Search "VOLKSWAGNUT" on YouTube since you cant watch a "certain" BELT change video round here
Usually and often edited |
|
| Back to top |
|
|
scottyellow67
Samba Member
Joined: September 25, 2010
Posts: 316
Location: Indiana, PA
|
| Posted: Sun Feb 09, 2014 7:17 pm Post subject: |
|
|
| Glenn wrote: |
I added it to the Sticky/FAQS.
Thanks for documenting this for others. |
My pleasure Glenn. Pickle and I enjoyed the project and had fun.
I would love to see an addition to the index specifically for "step by step" procedures for other projects. It would make 'doing a search' much easier.
Many times doing a search nets way too many matches that may include only a few words from your initial query. It seems that a lot of questions get asked and the asker inevitably gets slammed by someone telling them to search first.
If I decide to adjust my rear plates, I will be happy to do another "step by step" if it helps future people learn the process. If you know of one that is done-I'd love to see it as I have a great deal of research to do before I start.
Thanks again. |
|
| Back to top |
|
|
scottyellow67
Samba Member
Joined: September 25, 2010
Posts: 316
Location: Indiana, PA
|
| Posted: Sun Feb 09, 2014 7:19 pm Post subject: |
|
|
| VOLKSWAGNUT wrote: |
This is a very decent photo documentation....but change the title to BALL JOINT BEAM...as Link Pin Beams...have a few more critical steps....
Plus add.... alignment to follow installation |
Great idea done. Thanks.
Im sure I didn't go into enough detail on some items, but I hope I got the basic process covered. |
|
| Back to top |
|
|
volksgroove
Samba Member
Joined: October 19, 2010
Posts: 239
Location: Apopka, FL
|
| Posted: Mon Feb 10, 2014 3:56 am Post subject: |
|
|
The short shocks you received are for pretty low cars. Stock length shocks will work, as long as they do not bottom out when you hit bumps.
This is a well photographed and informative thread, man. Lots of peeps will benefit from this.
also... This link is my thread for drop plate installation. The process is the same for adjusting stock plates.
http://www.thesamba.com/vw/forum/viewtopic.php?t=576348&highlight=drop+plate
_________________
1969 Riviera "Ethel"
1965 beetle father/son build
1988 Scirocco 16v father/son build |
|
| Back to top |
|
|
volksgroove
Samba Member
Joined: October 19, 2010
Posts: 239
Location: Apopka, FL
|
| Posted: Mon Feb 10, 2014 3:57 am Post subject: |
|
|
The short shocks you received are for pretty low cars. Stock length shocks will work, as long as they do not bottom out when you hit bumps.
This is a well photographed and informative thread, man. Lots of peeps will benefit from this.
also... This link is my thread for drop plate installation. The process is the same for adjusting stock plates.
http://www.thesamba.com/vw/forum/viewtopic.php?t=576348&highlight=drop+plate
_________________
1969 Riviera "Ethel"
1965 beetle father/son build
1988 Scirocco 16v father/son build |
|
| Back to top |
|
|
ThingBeast
Samba Member
Joined: January 30, 2012
Posts: 363
Location: Texas
|
| Posted: Mon Feb 10, 2014 5:58 am Post subject: |
|
|
| Great write up Scottyellow. The steps taken are pretty much universal for ball joint or link pin, but like someone said, link pin is a little different. you happen to get lazy on my with the shims on the beam to body which is what i really was hoping to see. When do you need the said shims to body? Some tell me i don't need them unless i'm slamming it, others say i need it regardless....just don't know. I pretty much did exactly like you did in the tear down. I have everything back on except the control arms. I'm not sure how to remove the control arms from the spindle on my 61 king pin assembly. I removed the 2 nuts from the bottoms of the arms, but they won't slide off. any ideas? |
|
| Back to top |
|
|
scottyellow67
Samba Member
Joined: September 25, 2010
Posts: 316
Location: Indiana, PA
|
| Posted: Mon Feb 10, 2014 7:58 am Post subject: |
|
|
Maybe someone smarter than I can chime in here, but I understood that you would only need the shims if you planned to drop the front MORE than 1.5" or so than you did the back. These can be easily installed or removed without tearing everything apart. I would think you could jack the car up and support it. Loosen the 4 beam to frame bolts and slide the shims in (or take them out).
As to the control arm removal in your KP...hopefully that same "smarter guy" can help. |
|
| Back to top |
|
|
scottyellow67
Samba Member
Joined: September 25, 2010
Posts: 316
Location: Indiana, PA
|
| Posted: Mon Feb 10, 2014 8:13 am Post subject: |
|
|
| volksgroove wrote: |
The short shocks you received are for pretty low cars. Stock length shocks will work, as long as they do not bottom out when you hit bumps.
This is a well photographed and informative thread, man. Lots of peeps will benefit from this.
also... This link is my thread for drop plate installation. The process is the same for adjusting stock plates.
http://www.thesamba.com/vw/forum/viewtopic.php?t=576348&highlight=drop+plate |
Thanks man! I also appreciate your help in the beginning of my search!
On the shocks...I had the beam as low as I could get it to go (would never be able to drive it here in PA like that), and I could barely get the nut on the top (without the rubber spacer). There would have been no compression travel because the beam was bottomed out, and there would have been no extension travel as the shock doesn't go that way.
Do you think I'm missing something?
By the way, I'm very pleased with the beam and the quality of the welds. I went 4" narrowed in order to be able to run shocks. Beam slipped into place nicely. I'm sure it helps to have a straight car to begin with too! |
|
| Back to top |
|
|
ThingBeast
Samba Member
Joined: January 30, 2012
Posts: 363
Location: Texas
|
| Posted: Tue Feb 11, 2014 3:44 pm Post subject: caster shims |
|
|
| scottyellow, would it be possible for you to shoot a few pictures of the installed caster shims for me? I ordered a set, but don't know how or where to install them. thanks. |
|
| Back to top |
|
|
ThingBeast
Samba Member
Joined: January 30, 2012
Posts: 363
Location: Texas
|
| Posted: Tue Feb 11, 2014 3:46 pm Post subject: |
|
|
| Also, did you use delrin bushings or polyurethane bushings in your beam? |
|
| Back to top |
|
|
scottyellow67
Samba Member
Joined: September 25, 2010
Posts: 316
Location: Indiana, PA
|
| Posted: Tue Feb 11, 2014 3:57 pm Post subject: Re: caster shims |
|
|
| ThingBeast wrote: |
| scottyellow, would it be possible for you to shoot a few pictures of the installed caster shims for me? I ordered a set, but don't know how or where to install them. thanks. |
This isn't a pic of my car. I found it online. They just slip in between the lower tubes and the frame. When the long frame bolts are tightened, they stay in place. Pretty easy...
Also, my bushings were a red plastic like material. DubLab sent them along with my beam. They slid into place very easily.
In this pic the lower tube bushings are sitting on the "table". The lower bushings are in two pieces. I had to reach out to Derek for clarity, but it is pretty strait forward once you start putting it all together.
|
|
| Back to top |
|
|
ThingBeast
Samba Member
Joined: January 30, 2012
Posts: 363
Location: Texas
|
| Posted: Tue Feb 11, 2014 6:31 pm Post subject: |
|
|
| thanks a bunch scottyellow. That clears alot up for me. I have the same polyurethane bushings, mine are just the longer ones. I spoke with Airkewld this morning and he highly recommended me to go with the delrin bushings. I think I am going to go with the delrin ones. Apparently the red polyurethane ones are meant for dune buggies that are very light up front. A bug is approx 700 pounds, not very light. He said to go with oil shocks too. The gas shocks will make the front end far too stiff, he said "it'll knock the filling out of your teeth" (refering to gas shocks). After looking and reading thru AirKewld website, you can see that these guys have this suspension thing down to a science. Just my 2 cents. |
|
| Back to top |
|
|
scottyellow67
Samba Member
Joined: September 25, 2010
Posts: 316
Location: Indiana, PA
|
| Posted: Sun Feb 23, 2014 12:37 pm Post subject: |
|
|
We finally got a decent day that isn't freezing and the snow and ice are cleared from the streets so I was able to start the car and take it outside and around the block a few times.
Reminder. I have a 4" narrowed DubLab beam with shock towers. I also have installed new 2.5" dropped spindles.
I was NOT able to use the new KYB shocks that I bought that are for "lowered" bugs so I am running the stock height shocks.
Items noted in initial test run...
1)Very limited turning radius as the front tires rub on the headlight buckets when turning maybe 40 degrees either direction. I may need to do some custom work on the buckets to create clearance. If any of you know of any links where someone has shown their version of that process, I would love to see it for ideas.
2)The limited suspension travel creates a very "hoppy" ride. I doubt theres much I can do about that.
3)Front end alignment definitely in order. Lots of tire scrub when turning. Im sure if I keep it like this, Ill burn up tires in a hurry.
4)The new stance seems to magnify the ride height in the back. It definitely didn't seem that high before. I will need to decide what to do there. I would like to run a little bigger tire back there so...not sure. (I drove it a mile or so first to see if the rear would settle some...it didn't seem to).
5)The pics below show the car set as HIGH as I can get it!! Im wondering if I went back to stock spindles and adjusted the beam as LOW as it goes if I would have the same look. I think I may want somewhere in between?? Thoughts???
Here are todays pics...
Here is a shot of the steering wheel with the tires aimed strait ahead...Clearly need an adjustment there. I thought I had it closer than that.
I knew there would be a lot of adjusting that would need to be done to reset the car after such a change in suspension. I'm not discouraged.
What do you guys think of the stance as is now?
Any ideas for headlight bucket adjustment?
Any of you done this and gone back to the stock spindles? (I would basically either need to get some new tie rod ends or drill my old spindles so the new ends will fit)
What do you guys think about the "hoppy" ride? Probably just something I will need to live with. |
|
| Back to top |
|
|
scottyellow67
Samba Member
Joined: September 25, 2010
Posts: 316
Location: Indiana, PA
|
| Posted: Sun Feb 23, 2014 12:44 pm Post subject: |
|
|
Here is a before shot of the suspension...
And again, the after (today)...
|
|
| Back to top |
|
|
Ace
Samba Member
Joined: July 07, 2003
Posts: 1903
|
| Posted: Sun Feb 23, 2014 1:13 pm Post subject: |
|
|
As for the stiff front end, you can adjust one adjuster more than the other. Shorter torsions equal a higher spring rate. By adjusting one more than the other it reduces the weight on one spring and increases the weight on the other. Try having one adjuster all the way up and one all the way down while using the dropped spindles for better geometry. Make sure you are using grease that is safe for plastics if you are using urethane or delrin bushings.
Last edited by Ace on Sun Feb 23, 2014 1:16 pm; edited 1 time in total |
|
| Back to top |
|
|
scottyellow67
Samba Member
Joined: September 25, 2010
Posts: 316
Location: Indiana, PA
|
| Posted: Sun Feb 23, 2014 1:15 pm Post subject: |
|
|
| Ace wrote: |
| As for the stiff front end, you can adjust one adjuster more than the other. Shorter torsions equal a higher spring rate. By adjusting one more than the other it reduces the weight on one spring and increases the weight on the other. Try having one adjuster all the way up and one all the way down while using the dropped spindles for better geometry. |
Excellent! Thanks, I'll try it. |
|
| Back to top |
|
|
VOLKSWAGNUT
Fastest VW Belt Changer
Joined: October 14, 2007
Posts: 11225
Location: Flippin' a Belt........ .... Off-n-On ... NC USA
|
| Posted: Sun Feb 23, 2014 4:29 pm Post subject: |
|
|
Buying lower profile front tires... eliminates modifying headlamp buckets.
And yes.. you may need ....scratch that...WILL need to tweak the springs (adjusters) a bit, one vs the other to get a decent ride with narrowed springs.
Short torsion springs dont like to twist..
El cheapo oil shocks will ride smoother than gas charged shocks.
_________________
aka Ken {o\!/o}
Its your vehicle- stop askin' for approval-do what YOU like for cryin' out loud
Better to roll em' how you want and wear em' out-than lettin' em' rot out
Its about the going not the showing
Rebuilt to drive not decorate
WANTED: Local Eatin' Joints, Triple D for TheSamba contributions here http://www.thesamba.com/vw/forum/viewtopic.php?t=570510
Search "VOLKSWAGNUT" on YouTube since you cant watch a "certain" BELT change video round here
Usually and often edited |
|
| Back to top |
|
|
grandpa pete
Samba Member

Joined: July 06, 2008
Posts: 6426
Location: St. Petersburg, FL
|
|
| Back to top |
|
|
|


