| Author |
Message |
JsOiNmAmToHnAsN
Samba Member

Joined: March 02, 2009
Posts: 29
Location: Abilene, TX

|
 Posted: Sun May 18, 2014 7:52 am Post subject: 1964 VW bus rebuild Posted: Sun May 18, 2014 7:52 am Post subject: 1964 VW bus rebuild |
 |
|
Hello all,
Ive been lurking on the samba long enough, I figure its about time I put up what I have been doing for the last two years or so. This is my first split bus. My plan for her was/is to be a daily driver that I can hop in and go anywhere. Whether it be for camping, sight seeing, long distance trips, or going to work, I want it to be dependable. I am not a vw purist by any stretch of the imagination, but don't worry, Im not gonna build a shorty, turn my 11 window into a 21, or any of that other nonsense.
I guess to start I should talk about the mess I got myself into. I am not new to cars, boats, motorcycles or most other things with motors. I usually jump into projects that are pretty tough, and it takes me a while to get through them. Thinking about my natural tendency, I thought I would take the bus slowly, piece by piece, not to get too far over my head/overwhelmed with what needed to be done.
If it doesn't look too bad to you, don't worry, it fooled me too. There was a lot of metal replacement and lots and lots of bodywork. The first thing I wanted to do was figure out mechanically what I needed. It didn't come with an engine, and it hadn't been on the road since 1974, so I was expecting pretty much everything. First thing up was brakes, new/rebuilt everything, even replace two of the metal lines. I got everything working on 6v like it should, only to not be able to find a cheap engine with a 6v flywheel at the time. So I converted everything over to 12, and got a super cheap 1500sp. Threw some used tires on it, and drove it for a about three months or so. I didn't realize how structurally unsound my bus was until I started reading about how to replace my rockers and some of the other metal. That was the day I took the bus apart and started the metal work. I only have a small 110 Lincoln welder without a gas set up, so some of the body panels were quite difficult. I learned a few lessons about temperature and warpage, to say the least.
I got everything cut out, mocked up, and started welding. I had a friend over and we were taking turns welding. I only got pictures of him welding. Kinda hard to well and take pictures of yourself.
Drivers side rocker.
This picture show either how bad I warped it from heat, how bad of a fit it was, or both haha. It too some massaging to fit right, but I got it
Rockers finished
Somehow I went from only replacing metal, to priming the whole bus, so now it needed a ton of body work, and more sanding than I ever want to do again in my life.
I am not a painter. I am a mechanic. I know the theory behind it, and have helped paint many cars. Ive primered more than a few, sprayed a couple of single stage jobs, and painted other motorized projects. Since I am trying to do everything myself on this project, I figured the worst that could happen is spending a bunch of money trying to teach myself. It could always be repainted. Well my garage has almost a dirt style floor, really short ceilings, and I live in the city. I don't see how anything could possibly go wrong with that.
Turns out, I had to paint the roof of my bus outside, in the driveway, in texas.
Once I got the roof sprayed, I brought it in, set up my booth, and got busy.
Three layers of base coat seemed to cover everything.
And here is where I learned about loose plastic, fixing painting mistakes, and how ridiculous pearl is to paint.
I was able to fix it, but I almost had a stroke there on the spot.
Right about here, I learned a VERY important lesson.
1. If you are guestimating how much paint and clearcoat you need, get extra
2. If you can help it, don't paint when the paint store is closed. (Ei weekends)
I got two and a half layers of clear, and ran out. I was planning on doing 4, so I would have room to buff. (I am NOT good with a buffer)
Slightly embarrassing, but I still haven't buffed or don't anything with the paint since it dried. I think ive wiped it down once for a show, and that's it. A good cut and buff would really make it shine.
I didn't realize how long this would take to write, so Im going to stop here and come back later. Hopefully the pictures work out.
--And Im back.
Well after all the paint and body work, I spent a few months putting together the westy interior, but I spent most of that time sound proofing, and working on the underside of the bus. Around this time I had, had two different engines in my bus. A 1500sp (I put about 5k miles on it) and a 1600dp(I put roughly 6k on this one). By the saw, if I had to choose between my slap worn out 1500 and a decently fresh 1600dp, I would probably chose the single port. Well, I had to have more power. I don't mind having to go slow, but I would like to get out from in front of the green light with out getting ran over. So I had to enlist the help of an awesome local guy. I would like to say that James Dotson and I built my engine together, but I cant. These things are bassackwards from the last 5 engines ive built (water coolers). I pretty much was the gopher and he explained as he went. If I would've built this thing myself, it might would have run, but it wouldn't have ran long. I ended up going with a 1776dp, and ive been quite happy with it.
I installed an secondary oil cooler with fan, and remote oil filter. I was unreasonably paranoid about running hot for the first couple of weeks I drove it. I knew how much I had in that engine, and I know how quickly one will leave you on the side of the road if you abuse it and don't listen to its warnings. I finally got use to all its new sounds (had a different exhaust on new engine) and started driving it like it was meant to be driven. So far I have about 4-5k on this engine, and love it.
I have done a lot of little things, that don't really have to be mentioned (all the little detail work: polishing the chrome, fixing latches, air vents, making heat work)
There are a couple of things that I need to finish up, but I haven't really been inclined to do yet. I still haven't finished making the wooden ceiling panels, haven't covered the seat beside the sink yet, and haven't covered the front seat (it just has a blanket on it). But before I get to that, Im going to do something drastic.
For some unknown reason, the front of my bus sits about 1.5 higher than its supposed to, and it rides awful. I rode in a friends 67 that has drop spindles, narrowed and adjustable beam that is slammed, and they rode the same. The front is that crappy. I greased the crap out of it, and it rode better for 3 days. Over the course of a month I used an entire tube of grease on the beam. Never got better.
Second problem, Ive been building this so I could drive in the city or drive long distance. I HATE the gearing in the bus. I drove a '78 Westy for 3ish years. It might have been ugly as sin, but drivability wise, it beats the split. So I finally decided how Im going to fix all of that. In one swoop.
Im going with full air ride (Front and Rear,) and swapping to IRS. I will probably get bashed on this one, but I don't really care. I know I could spend the money to make my original suspension ride correctly...or I could spend more money and have it ride more like a new car. As for the trans, Im gonna go with the 4.12r&p, with factory gears. With the tires I want, it should put me right at 70mph@3500. From there, I can go up or down in tire sizes if I feel the ratio isn't quite right. I have heard people a few people running this combo and liking it, a few that say anything less than a 2110 with that gearing wont make it up a hill, and have heard to two gentlemen that used a 1600 sp behind that trans. I figured if I decide it doesn't have enough power, then down the road I can just stroke it.
Ive already got half of the parts I need for the suspension and the trans, and plan on gather the rest, so that when I get home I can get started on it.
Don't be terribly surprised if this takes a while, Im also building a 1939 Chevy for a guy. If I get a chance, Ill throw a picture of it and the bus fighting for garage space haha.
Honestly, I wish I would've kept better notes of what I finished on what days. I meant to do a thread as I went, but I got lazy, the pictures slowed down, and then I just didn't really care to type all this out. From now on, ill try to keep this thing updated. If you're new at this, and youre building a bus, feel free to ask me some questions. If your experienced, don't laugh too hard at the few screw ups Ive had. Some have been slightly comical. Like showing off how well I had fixed the ebrake, and the button shooting out of it like a missile.
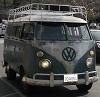
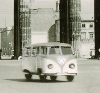
These are about the best before and after pictures I have. I did take any of it sitting in the same spot from the same angle, other than this.
Last edited by JsOiNmAmToHnAsN on Sun May 18, 2014 12:07 pm; edited 1 time in total |
|
| Back to top |
|
 |
Vintagespeed
Samba Member

Joined: October 01, 2005
Posts: 579
Location: Westerlo (Belgium)
|
| Posted: Sun May 18, 2014 8:05 am Post subject: |
|
|
cool build. Nice that you did all that and saved that poor combi (standard?).
I would have gone with the original color, but this seems nice too.
Good luck with finishing her up. I remember it well this is were the cash and parts start flowing (rubbers, hinges, grab handles, locks, etc etc) and a full interior. This is a killer 
Keep those pictures coming, we love 'm |
|
| Back to top |
|
|
Ran When Parked
Samba Member

Joined: September 26, 2013
Posts: 781
Location: Birmingham, AL
|
| Posted: Sun May 18, 2014 8:34 am Post subject: thank you. |
|
|
| Thanks for posting. |
|
| Back to top |
|
|
glideking
Samba Member

Joined: February 02, 2013
Posts: 990
Location: California
|
|
| Back to top |
|
|
JsOiNmAmToHnAsN
Samba Member
Joined: March 02, 2009
Posts: 29
Location: Abilene, TX
|
| Posted: Sun May 18, 2014 11:19 am Post subject: |
|
|
| Well the original color isn't that red. Its supposed to be all white. I have tons and tons of pictures, but Im not going to put too many more on here. It takes forever. The bus is mostly finished, and has been for about a year. I was driving it daily for a year and a half, until just recently. Im out of the country for work for the next few months. |
|
| Back to top |
|
|
BarryL 
Samba Member

Joined: November 01, 2004
Posts: 15282
Location: Casa de Oro, California
|
| Posted: Sun May 18, 2014 1:35 pm Post subject: |
|
|
| Hey that looks like a pro in metal, prep, and gloss did it. |
|
| Back to top |
|
|
wcfvw69
Samba Purist

Joined: June 10, 2004
Posts: 13686
Location: Arizona
|
| Posted: Sun May 18, 2014 4:55 pm Post subject: |
|
|
Nice job on redoing your bus.
_________________
Contact me at [email protected]
Follow me on instagram @sparxwerksllc
40+ years of VW repair, and VW parts and vehicle restoration experience.
The Samba member since 2004.
**Now rebuilding throttle bodies for VW's and Porsche's**
**Restored German Bosch distributors for sale or I can restore yours**
**Restored German Pierburg fuel pumps for sale or I can restore yours**
**Restored Porsche fuel pumps or I can restore yours**
**Restored Porsche distributors or I can restore yours** |
|
| Back to top |
|
|
RPGreg2600
Samba Member
Joined: November 07, 2010
Posts: 1657
Location: Vallejo, CA
|
| Posted: Sun May 18, 2014 8:44 pm Post subject: |
|
|
Did you paint over one of the rubber bumpers? |
|
| Back to top |
|
|
Soul Built
Pimpin' Aint Easy

Joined: August 28, 2004
Posts: 1636
Location: SoCal
|
| Posted: Mon May 19, 2014 12:43 am Post subject: |
|
|
| RPGreg2600 wrote: |
Did you paint over one of the rubber bumpers? |
Did you just pick fly-crap outta pepper? |
|
| Back to top |
|
|
JsOiNmAmToHnAsN
Samba Member
Joined: March 02, 2009
Posts: 29
Location: Abilene, TX
|
| Posted: Mon May 19, 2014 5:58 am Post subject: |
|
|
| Soul Built wrote: |
| RPGreg2600 wrote: |
Did you paint over one of the rubber bumpers? |
Did you just pick fly-crap outta pepper? |
Haha, no Greg is right, I did paint over one of the bumpers. I coudnt get it off to save my life. I murdered the other ones that I took off, so by the time I got to this one, I didn't think it would hurt anything to leave it on. It had shrunk with age, and I was planning on replacing it. Well I never got around to doing anything about it. Its still on my bus, and its still holding the paint surprisingly enough. I'm not perfect and never will claim to be. I did my best with what I had and the time I had available.
There are a few little things like this that I didn't think all the way through. Like painting the inside of the decklid first, and then painting the outside coat. Or making sure that BOTH doors were lined up properly before paint. Like I said before, this is a daily driver. As much as I would love to win shows for beauty, I like this ol girl the way she is. Im not afraid to camp in her, or get her dirty. Having a trailer queen would be way too boring. |
|
| Back to top |
|
|
JsOiNmAmToHnAsN
Samba Member
Joined: March 02, 2009
Posts: 29
Location: Abilene, TX
|
| Posted: Thu Jun 05, 2014 7:48 am Post subject: |
|
|
I have a little bit of an update, but more of a rant. I purchased a fairly large order from Creative Engineering(about $3700), and it still hasn't shown up. Now before you start to think oh, he's just impatient, think again. I placed my order on Feb 19th. While I was reading the reviews, I was thinking that it was only a few people that had issues, and that it wasn't that big of a deal. On top of that, I hadn't seen anyone with a large order that was complaining. I guess I thought that I would be the exception. About 50% of the people that I had read about received their stuff in two to three months. Since I knew I would be gone for longer than that, I also thought that it wouldn't make a bit of difference for me (other than my wife would be the one that gets stuck moving the boxes into the garage haha). Well it has been 15 weeks since I have ordered the suspension from them, and all I have gotten is empty promises. I gave them until the middle of April before I started hassling them. I have yet to be able to catch them on the telephone, but they finally started answering my email. One response for every two of my emails, so less than stellar communication. On top of that, Mandy has promised twice that my stuff would ship out that week.
I finally got a reply from Dave on May 13. He said that he was still chasing down a supplier, and my parts should be dispatched in 14 days. So how in the h*ll did Mandy expect to ship the stuff when she was previously making the promises to ship the same week I emailed her? Those were FLAT out lies. On top of that, its June 5th. Im pretty sure its been more than 14 days. Even if you're only counting business days, its been 17 business days. No email, no tracking number, no form of communication what so ever.
DO NOT order anything from them. They might make very high quality parts, but it is not worth the hassle to get them.
If they try to make it right after I get my parts, I will post whatever they do to fix it, as all vendors should have accurate feedback, but I am not counting them doing anything about it.
Other than the parts from them, it looks like I just about have everything that I need, all the little parts, transmission, etc. Only thing Im missing are having my extra pair of spindles dropped and air tank/compressor set up. |
|
| Back to top |
|
|
JsOiNmAmToHnAsN
Samba Member
Joined: March 02, 2009
Posts: 29
Location: Abilene, TX
|
| Posted: Fri Aug 15, 2014 12:51 pm Post subject: |
|
|
I finally received the beam from CE.
The dog was just as excited as I was. Somehow they managed to get it from their shop to my house in two and a half days. Might be because I had told them about cancelling my order as soon as it hit the 6 month mark. They cut it pretty close. Unfortunately, it will be a month and a half before I am back home. (My wife took the pictures for me) |
|
| Back to top |
|
|
brettsvw
Samba Member
Joined: November 22, 2007
Posts: 2158
Location: Florida
|
|
| Back to top |
|
|
JsOiNmAmToHnAsN
Samba Member
Joined: March 02, 2009
Posts: 29
Location: Abilene, TX
|
| Posted: Sat Aug 16, 2014 6:03 am Post subject: |
|
|
Thanks. Yeah its been kind of depressing how long it took to get all that stuff. A few friends read through my thread and said that I didnt put up near as much info on the work I did. Im just really bad at remembering to take pictures. There were alot of issues with the metal fitting, and I replaced more than just the rockers and floor. I might put up some more pictures here in a few days as I sort through my phone.
I'm excited an nervous about fitting the air ride. I dont want to tub my bus. Not because I think tubs are wrong, or from fear of cutting and welding. I just dont want the headache of dealing with it. There are some good tubs out there, but you always have to sacrifice something, seat height/comfort/adjustability etc. I know I can play around with tire sizes, but I dont want a rubber band looking tire either. I need a little bit of sidewall for it to ride decent. I might have to play with regular spindles and drop spindles to see what kind of height i get out of it. The planned front set up is going to be CE Air beam, 3.5" drop spindles, 165/60 tires on 15" American Eagle rims. Any chance some one out there could give me an estimated guess if I will clear? I'm sure I will have to channel the frame for the tie rods to clear and to have the correct steering geometry. My second question is has anybody ran both 175/55 and the 165/60 tires? I'm just curious about the ride quality difference between the two, if there is any. |
|
| Back to top |
|
|
JsOiNmAmToHnAsN
Samba Member
Joined: March 02, 2009
Posts: 29
Location: Abilene, TX
|
| Posted: Mon Oct 06, 2014 8:59 am Post subject: |
|
|
I havent been keeping up with this thread as much as I would like, but I have made some progress. Ive been home for about two weeks, and have been working on the bus most of that time. I have most of the air ride installed, but still have a few days worth of stuff left to do. I need to install the ride height sensors, finish the front tubs, and then do the fine tuning. I was hoping to drive the bus yesterday, but somehow my 2 year old master cylinder went bad during the 7 months I was gone. I'll post up a few pics now, but I will put up better ones when everything is installed. It ended up sitting alot lower than what I wanted, and with that came alot of 'trimming'...such as notching the frame 5 inches, tubbing the front, shaving the some of the backspacing off of the wheels, etc. As long as the ride is decent, I will probably leave it sitting that low. It is kind of a pain to put the bus on 2x4s just to get a jack underneath it though.
And before someone criticizes how dirty my garage is or how the underside doesnt look finished, it isnt finished. I was able to accomplish all of that in 2 weeks while spending time with the wife and 8mo baby.
|
|
| Back to top |
|
|
JsOiNmAmToHnAsN
Samba Member
Joined: March 02, 2009
Posts: 29
Location: Abilene, TX
|
| Posted: Wed Nov 05, 2014 12:42 pm Post subject: |
|
|
I just got back from driving the bus to Alabama and back. We decided to drive it for the family vacation. I didn't even have the suspension completely finished (and still don't). Theres a few odds and ends to finish up, but its mostly done.
The bus did pretty amazing. It sat for 7 months while I was out of the country. When i got back, I drove it for a day or two, and then started the air ride stuff. I added a few cool parts as well, like a DD CHT gauge and Smiths electronic speedo. Both were amazing for the trip btw. I didn't do any carb cleaning or anything to the engine. I installed a new irs trans with 4.12 gears, mostly finished the tubs for the front and the air ride. I ended up going with 165/60/15 on the front and 175/65/15 on the rear. I was afraid of going wider in the rear for clearance reasons, but I believe a 185 would fit without rubbing. I only got about 100 testing miles on it before the trip, so I was a little nervous. Everything ended up being fine.
We put 3400 miles on the bus. We drove through flat lands and through hills, and just let me say how impressed I am with the 4.12 R&P and IRS. I had a top speed of 80, and easily cruised at 70 for most of the trip. It averaged around 25mpg. Surprisingly it got better at 70 than it did at 60. The best we got was 29, and the worst we got was 21. Probably the difference in hill climbing and flat. We had the bus fully loaded and still never went any slower than 50mph climbing the mountain in north alabama. I would HIGHLY suggest this over the 3.88 unless you have a large engine. I was doing all of this with a 1776. Even with all the weight, the extra stress from a higher gear ratio, and driving it straight for 16+ hours at a time, I never saw the temp gauge go over 425. I got it that high by driving 80mph for the last three hours of the return trip. There were three fairly long hills right at the end of the trip and on the last one, I hit it.
Now for the air ride….Creative Engineering has done a decent job with their setup. The rear set up is great for ride quality. The front is better than stock, but no where near what a well set up air ride system should be. They use adjustable dampening shocks, which help(but you have to spend 3k mi adjusting them to get them right). I don't think it is worth it for ride quality, its a lot of dough to cough up for 25% better ride quality in the front. However, if you are doing this to sit real low and still be able to drive, it works pretty damn well. I am using Accuair's Elevel, but I haven't hooked up the ride sensors yet, so I can't say how well it adjusts.
Now for the pictures
Last edited by JsOiNmAmToHnAsN on Wed Nov 05, 2014 3:56 pm; edited 3 times in total |
|
| Back to top |
|
|
Abscate
Samba Member
Joined: October 05, 2014
Posts: 24049
Location: NYC/Upstate/ROW
|
| Posted: Wed Nov 05, 2014 3:09 pm Post subject: |
|
|
When you jump that front end, don't forget to play Kriss Kross'
Jump ...Jump.....Jump...
_________________
🇺🇸 🇺🇸 🇺🇸 🇺🇸 🇺🇸 🇺🇸 🇺🇸 🍊 🍊 🍊 |
|
| Back to top |
|
|
Bus Twin
Samba Member
Joined: May 22, 2003
Posts: 29
Location: Alberta
|
| Posted: Wed Nov 05, 2014 4:10 pm Post subject: |
|
|
Great work. Thanks for all the pictures and for the inspiration!!
Congrats! |
|
| Back to top |
|
|
JsOiNmAmToHnAsN
Samba Member
Joined: March 02, 2009
Posts: 29
Location: Abilene, TX
|
| Posted: Mon Feb 15, 2016 9:59 am Post subject: Re: 1964 VW bus rebuild |
|
|
I guess its time I update this thread, mainly for my own records. I daily drive this bus, and I was getting tired of the headache of the aircooled engine. Constantly adjusting valves, chasing oil leaks, setting points, tweaking the carbs, dealing with hard starts when its cold, etc. So I finally did it. I went fuel injected, and water cooled.
I had always kept the idea in the back of my mind that I would do it some day. After three carb fires in two months, I guess I got enough of a nudge in that direction. I got pretty lucky when I was looking for parts to piece together everything, and came out way cheaper than the kits that are for sale. I ended up going with a 2.2 ecotec with dbw from a salvage yard here in town. Ecotecs aren't terribly common in my town, but I happen to be in the right place at the right time I guess.
I searched all over the forums to see if anyone had been successful with the dual in bay radiator setup, and pretty much the only person that I had found was Raby. Since my bus almost lays on the ground, the under bus design just wouldn't cut it, so I gave it a shot. I don't have a lot of miles on this setup, but so far so good. Ive gotten more than a few 70-75mph runs on the highway staying at 195* with out the fans coming on, so I'm on track.
If anyone is interested in putting an ecotec in a split bus that has converted to IRS, let me tell you its not easy at all. When you go IRS, it slides the engine back a little bit which is not in your favor. The eco almost didn't fit. I had to remove the latch on my decklid and cut the backing frame on it just to clear the crank bolt. I spent way too long doing this swap because I was keeping it reversible. Except for the apron, I could reinstall the aircooled engine in 30 mins to an hour. Will I ever do it? Definitely not after driving with this new engine, but I like to keep my options open.
I'm not finished with everything, but its back to driving status. There are still somethings that need to be 'prettied' up, and I need to install the speed sensor, A/C, and rotate the fuel sender in the tank (I installed it in a hurry and it catches on the side of the tank). I wont go into a lot of detail about the swap unless anyone is actually curious, but I'll post up some pics.
And heres the one I'm the most proud out. I have everything hidden and tucked away. I even tried to run the exhaust like the stock bus.
|
|
| Back to top |
|
|
williamM
Samba Member
Joined: August 07, 2008
Posts: 4342
Location: southwest Arizona
|
| Posted: Mon Feb 15, 2016 10:31 am Post subject: Re: 1964 VW bus rebuild |
|
|
Stock nazies are screaming and tossing computers at walls, but I am way envious- you have put your old bus into a tiny % of "modern" equipment. If vw had made these we would all be driving them. Only thing left is disc brakes and bay window gas tank. show us more.
_________________
some days I get up and just sit and think. Some days I just sit.
opinion untempered by fact is ignorance.
Don't step in any! |
|
| Back to top |
|
|
|


