| Author |
Message |
oldskoolbug
Samba Member
Joined: December 07, 2008
Posts: 434
Location: Toronto, Canada

|
 Posted: Sun Sep 06, 2009 5:50 pm Post subject: Wiper wiring - Bare with me... *** UPDATE *** Posted: Sun Sep 06, 2009 5:50 pm Post subject: Wiper wiring - Bare with me... *** UPDATE *** |
 |
|
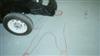
Ok, so the wiring harness is in, and I've tested all of the electrical system. Everything works EXCEPT for the wiper motor. Whenever I pull the switch, it pops the fuse. Its a '62 bug converted to 12v with an original 6V SWF wiper. I replaced the stock 6v armature with a 12v unit purchased on cip.
http://www2.cip1.com/ProductDetails.asp?ProductCode=VWC%2D113%2D955%2D811%2DB
Wiring for single speed, was double checked as per photo below:
Now, as mentioned, whenever I pull the switch, the fuse pops. From doing some research here, seems that the wiper arms cannot ground on the body  What about the bolt that holds the wiper motor onto the body. Does the wiper unit ground itself here? What about the bolt that holds the wiper motor onto the body. Does the wiper unit ground itself here?
The wiper switch itself, when I pull it, it seems to have two positions, but its wiring would indicate its a single speed. I'm not too familiar with these switches, so I'm a bit ignorant on this subject.  Could my switch be faulty, or is this a two speed switch? Could my switch be faulty, or is this a two speed switch?
Also, is there a way I can test the motor for functionality outside of the car? Thanks!
*********** U P D A T E **************
Ok, problem has been solved.  #1 the wiper shafts were grounding on the body due to worn out rubber grommets #1 the wiper shafts were grounding on the body due to worn out rubber grommets  , and #2 the wiper motor itself wasn't grounding out on the support bracket , and #2 the wiper motor itself wasn't grounding out on the support bracket  . Wiper motor NOW works . Wiper motor NOW works  , and yes switch is a single speed unit. It just needed some WD40! , and yes switch is a single speed unit. It just needed some WD40! 
Amazing what a little bit of forum research can do!  Still, it never hurts to get a 2nd opinion from TheSamba crowd! Still, it never hurts to get a 2nd opinion from TheSamba crowd! |
|
| Back to top |
|
 |
oldskoolbug
Samba Member
Joined: December 07, 2008
Posts: 434
Location: Toronto, Canada
|
|
| Back to top |
|
|
EODinert
Samba Member

Joined: April 11, 2003
Posts: 464
Location: PHX, AZ
|
| Posted: Mon Sep 07, 2009 2:01 am Post subject: |
|
|
I just did a 12v conversion on my wipers, and on mine, the wiring was backwards from the schematic... or at least partially backwards... but I can't tell you what year my new wiper motor is, because I bought it at a junk yard.
For the conversion, I needed an SWF brand, and my '61 came with a Bosch. In my head, I pictured the schematic as looking down on the car from above, but at least for my new SWF motor, the ground was on the opposite side. This caused me some problems, at first, that involved smoke coming out of a pair of clip leads that I was using to jump power to the unit to see if it worked.
The ground on my SWF motor was obviously the ground, as I could see with my calibrated eye ball that the screw terminal was connected to the case of the wiper motor.
I don't know if my '61 motor matched the schematic, or was backwards, because I didn't check when I took it out.
Hope that helps...
_________________
'61 rag top beetle, '73 type 181, '66 13 window deluxe |
|
| Back to top |
|
|
oldskoolbug
Samba Member
Joined: December 07, 2008
Posts: 434
Location: Toronto, Canada
|
| Posted: Mon Sep 07, 2009 5:12 am Post subject: |
|
|
| EODinert wrote: |
I just did a 12v conversion on my wipers, and on mine, the wiring was backwards from the schematic... or at least partially backwards... but I can't tell you what year my new wiper motor is, because I bought it at a junk yard.
For the conversion, I needed an SWF brand, and my '61 came with a Bosch. In my head, I pictured the schematic as looking down on the car from above, but at least for my new SWF motor, the ground was on the opposite side. This caused me some problems, at first, that involved smoke coming out of a pair of clip leads that I was using to jump power to the unit to see if it worked.
The ground on my SWF motor was obviously the ground, as I could see with my calibrated eye ball that the screw terminal was connected to the case of the wiper motor.
I don't know if my '61 motor matched the schematic, or was backwards, because I didn't check when I took it out.
Hope that helps... |
My wiper issues are no longer existant.. My 3 wire (one speed) switch was wired to the wiper correctly. My problem was that the wiper shafts were grounding out on the body, and the wiper motor itself wasn't properly grounded. Once I took care of those two issues, the wiper came to life!
Next on my agenda, is to disconnect the wiper, crack it open and give the gears a good cleaning, and lube them up with new grease! I'm guessing 47 year old grease just isn't going to do the job! |
|
| Back to top |
|
|
Blue69Baja
Samba Member

Joined: September 04, 2008
Posts: 1116
Location: Fair Oaks
|
| Posted: Mon Sep 07, 2009 7:32 am Post subject: |
|
|
oldskoolbug, I just finished doing a tear down of my 69 wiper gearbox and motor. This is the type motor that has the wire retainer for the cover on the motor, not the round motor.
The motor sounded like it was struggling and the wipers were slow.
I found the gear box to be doing quite well and didn't need anymore grease. I just moved the excess around and that was all.
What I did find, bench running the motor is that the Armature (wheel) was beginning to touch the field magnets. This is caused by bushing wear and the plastic stop where the armature shaft contacts inside the gear box. The slop in the bushing and the plastic stop is actually tolerable but not for the armature. The contact/rubbing makes the armature heat up pretty quick and will finally burn it up.
I used a battery and some alligator test leads to run the motor.
I used a piece of cellophane (thin paper) and found the spots that the armature was rubbing.
Before you take the motor apart wedge some tissue paper between the brush wires and the brush body. Use a dental hook to gently pull the brush away from the communicator, then put the tissue in. This will keep the brushes from popping out...If they pop out....you will need a lot of patience putting them back in.....Believe me I know.
Now use a Moto tool with a grinding wheel and remove some metal from the areas of contact. I had to do it 3 times to get the motor to not contact. I probably didn't remove more than .020....that cured the dragging....whahoo. Be sure and remove the metal dust from the magnets. If they get back to the contact area some binding may occur.
I have no Isolation issues with my assy. The rubber is for sealing and viberation reduction. I confirmed that during bench testing and in the car.
Jim |
|
| Back to top |
|
|
EODinert
Samba Member
Joined: April 11, 2003
Posts: 464
Location: PHX, AZ
|
| Posted: Mon Sep 07, 2009 1:35 pm Post subject: |
|
|
Inside my wiper motor, from another forum:
Today I decided to make my wipers work. Actually, I decided to make them work a week ago, and ordered some bits to facilitate that from Wolfsburg West. They recently got some conversion armatures back in stock (after being out of stock for a very long time, from what I understand), to convert your 6 volt SWF wiper motor to 12 volts. Why only the SWF wiper motors can be converted, I don't know, but if you have a Bosch, you have some shopping to do.
I did some reading about the different methods of conversion, and decided that using a 12v armature would be best. My son will be driving this car, and it would be good, should it rain, if the wipers work.
My '61 came with a Bosch. I went to Blair & Sons on Broadway, and got me an SWF for about $30 bucks. It was ugly, but it said 'good' in felt pen on the side. It looked like it had been in a potato sack with a bunch of flywheels bouncing around in the back of a truck. Ok, not that bad, but the aluminum cover is soft, and it bears the scars of its junk yard life. On the inside, it was pretty clean.
It's gotta say this on top:
Here's what I started with: A wiper motor, and an armature.
Open 'er up:
There are only two screws you need to take out to swap armatures. This is one of them. The other one looks just like it, but is on the other side.
Once you have both screws out, you can lift off the brushes.
Take out the old armature, and kick it to the curb. It lifts right out, just give it a tug.
Get the new armature out of the box, and get ready to install it. I was going to say 'put a dab of grease on the gear on the new armature' right now, but I ended up opening up the other side of the wiper motor to change the grease... but if you did put a dab of grease on the drive gear right now, this is what it would look like.
Put the brushes back on, after you put the new armature in. You'll have to spread them a little, just like this:
Put the screws back in.
At this point, I decided that I did not want to count on 50 year old grease to keep my wipers wipin', so I decided to see what I could do on the other side. I took out the four flat head screws on the bottom, on the plate that the arm sticks out of.
It came apart real easy, and nothing fell out and got lost. Nothing was even loose. Normally, when I do something like this, parts shoot across the room, never to be seen again. Not this time.
Crustiness
I busted out a Q-tip, and went to work. This is what came out. Not pretty. Feeling like a smart guy for decided to open this thing up.
After I swabbed it out, it looked a lot like this:
I packed it full of new grease, and put it back together with no surprises. If you look directly left of the hole in the center of the greasy spot, that's the drive gear off the end of the armature...so you can see futility of greasing the gear on the armature during the top half overhaul since you should be taking the gear box apart to replace all of the grease (since it's so easy).
I'd like to finish this with '...and then I put it in my car, and it worked perfectly', but I don't have electricity in my car yet. So, when I get electricity in my car, I'll come back and tell you that it worked perfectly.
Anyway, if your wipers are moving way to fast on your window, and you'd like an option, this really is pretty easy. Way easier than getting the wiper frame assembly in and out of the car, taken apart, and put back together.
Edited to add: I got my car going, and it works great, but the wipers park in the wrong place. For now, I've disconnected the 'parking' wires, and just shut them off when they get near where they need to be (not that it ever rains here, or anything).
I understand I need to de-weld the arm that comes off the bottom, and re-locate it when the wipers are parked... but that's a project for another day.
_________________
'61 rag top beetle, '73 type 181, '66 13 window deluxe |
|
| Back to top |
|
|
Blue69Baja
Samba Member
Joined: September 04, 2008
Posts: 1116
Location: Fair Oaks
|
| Posted: Mon Sep 07, 2009 9:15 pm Post subject: |
|
|
Now that makes me mad.....I should have taken some pix's for posting...
The 69 motor has 4 brushes!!!! Probably for the 2 speed feature.
I picked up another 2 speed, when I got through it I'll take pix's.
EODinert, very nice post!!!
Jim |
|
| Back to top |
|
|
gerg
a.k.a. 6volt65

Joined: April 25, 2003
Posts: 5454
Location: Monroe, LA
|
| Posted: Fri Oct 16, 2009 12:42 pm Post subject: |
|
|
Well, six years in the waiting and I have FINALLY completed the first 'in car' electrical test of my restoration.
I had a Bosch 6V motor (  ) so the SWF drop in armature would not work for me. So, I got a '68 two speed motor from a local shop . . .and for one of may reasons, I decided to go single speed in the original housing. So, I opened them both up and dropped the later 12V armature into the 6V housing. ) so the SWF drop in armature would not work for me. So, I got a '68 two speed motor from a local shop . . .and for one of may reasons, I decided to go single speed in the original housing. So, I opened them both up and dropped the later 12V armature into the 6V housing.
I had to change the drive arm so the small pin matched my linkage components.
Wired up like the middle graphic above and WOOOOHOOOOOOO it works as should be!!!
They park when off, and run fine in either switch position. Single speed of course.
Only snafu was a single E clip came off on the driver's side . . . but that is small potatoes compared to where I was 3 weeks ago 
_________________
Gerg
. . . I got 99 problems and my bus ain't one . . .
'65 Sunroof Beetle
'65 Vert
'60 Singlecab |
|
| Back to top |
|
|
BUGTHUG
Samba's Rented Mule
Joined: April 22, 2007
Posts: 833
Location: KANSAS toto's fire hydrant
|
| Posted: Fri Oct 16, 2009 5:38 pm Post subject: |
|
|
EODinert, I don't think you have to cut and reposition the arms. I was reading somewhere, I'll try to find it again, where they pulled one of the wires and touched it to another wire and it causes it to park where its suppose to . I was looking to buy a new wiper assey and this company had the whole set up but out of stock, and they explained how to reset the park position by just messing with a wire.
_________________
I know you would understand what I'm saying if you could just see my HANDS
Even the middle of the week says W T F
1963 15 window bus
1966 VW bug
1966 21 window micro bus
1969 Dune Buggy
1965 VW bug
1974 VW bug
1972 Kelmark, VW drive line
1948 Chevrolet Hearse |
|
| Back to top |
|
|
gerg
a.k.a. 6volt65
Joined: April 25, 2003
Posts: 5454
Location: Monroe, LA
|
| Posted: Fri Oct 16, 2009 7:03 pm Post subject: |
|
|
That is interesting because the park is triggered by a clocked connection on top of the final drive plate where the wire connectors brush as it spins.
_________________
Gerg
. . . I got 99 problems and my bus ain't one . . .
'65 Sunroof Beetle
'65 Vert
'60 Singlecab |
|
| Back to top |
|
|
BUGTHUG
Samba's Rented Mule
Joined: April 22, 2007
Posts: 833
Location: KANSAS toto's fire hydrant
|
| Posted: Fri Oct 16, 2009 11:05 pm Post subject: |
|
|
OK ,I just remember were I read that. Its on the Cip-1 site with the new wiper assey they have for sale, its VWC-113-989-955 they have some info at the bottom of the page on how to clock the PARK setting. I hope this is what EODinert was talking about.
_________________
I know you would understand what I'm saying if you could just see my HANDS
Even the middle of the week says W T F
1963 15 window bus
1966 VW bug
1966 21 window micro bus
1969 Dune Buggy
1965 VW bug
1974 VW bug
1972 Kelmark, VW drive line
1948 Chevrolet Hearse |
|
| Back to top |
|
|
gerg
a.k.a. 6volt65
Joined: April 25, 2003
Posts: 5454
Location: Monroe, LA
|
| Posted: Sat Oct 17, 2009 1:15 am Post subject: |
|
|
Looks like the drive arm is tapered and you can set it anywhere:
Special Note about setting the stop position: These motors are not pre-set in the park position. The nut that holds the small arm to the shaft sticking out of the motor is not tightened down. These are shipped loose from the factory. The shaft is a tapered fit and the arm needs to be adjusted to the correct position before it can be tightened.
Positioning the motor shut-off: You will need to ground the assembly and then apply power to either terminal 53 or 53b (doesn’t matter which one). Once the motor is working, the power wire needs to be taken off 53 or 53b and put against terminal 53a to make it park and stop. Then tighten the nut and then your done.
_________________
Gerg
. . . I got 99 problems and my bus ain't one . . .
'65 Sunroof Beetle
'65 Vert
'60 Singlecab |
|
| Back to top |
|
|
mrmeharry
Samba Member
Joined: January 09, 2023
Posts: 6
Location: Sun City, AZ
|
| Posted: Mon Jun 26, 2023 2:22 pm Post subject: Re: Wiper wiring - Bare with me... *** UPDATE *** |
|
|
I have a 2 speed ( I Think) motor and putting it on a Manx. I have a single toggle switch I'm using and a voltage step-down as well. What is the best way to wire it --there are 3 spade connectors on the motor plus a ground wire. I only need it to run on 1 speed.
Thanks |
|
| Back to top |
|
|
Cusser
Samba Member

Joined: October 02, 2006
Posts: 33018
Location: Hot Arizona
|
| Posted: Mon Jun 26, 2023 8:39 pm Post subject: Re: Wiper wiring - Bare with me... *** UPDATE *** |
|
|
| oldskoolbug wrote: |
| Wiper wiring - Bare with me... |
As per Everett's advice: I'm keeping my clothes ON !!!
_________________
1970 VW (owned since 1972) and 1971 VW Convertible (owned since 1976), second owner of each. The '71 now has the 1835 engine, swapped from the '70. Second owner of each. 1988 Mazda B2200 truck, 1998 Frontier, 2014 Yukon, 2004 Frontier King Cab. All manual transmission except for the Yukon. http://www.thesamba.com/vw/forum/album_page.php?pic_id=335294 http://www.thesamba.com/vw/forum/album_page.php?pic_id=335297 |
|
| Back to top |
|
|
EVfun 
Samba Member

Joined: April 01, 2012
Posts: 6127
Location: Seattle
|
| Posted: Mon Jun 26, 2023 10:06 pm Post subject: Re: Wiper wiring - Bare with me... *** UPDATE *** |
|
|
| mrmeharry wrote: |
I have a 2 speed ( I Think) motor and putting it on a Manx. I have a single toggle switch I'm using and a voltage step-down as well. What is the best way to wire it --there are 3 spade connectors on the motor plus a ground wire. I only need it to run on 1 speed.
Thanks |
This came up in a previous thread, a fairly common beach buggy issue. Here is my schematic in ASCI format. You should be able to use 6 volts via a step down in place of the +12 volts if the relay is 6 volt automotive 5 terminal relay and reduce the resistor value to about 750 ohms. If you are using a relay with built in coil suppression the resistor is not needed.
The wiper motor, if it's from a Bug, should have the terminals 54, 31b, and 54. It may or may not have a terminal 31. If that terminal is not provided you will need to add a ground wire from the wiper frame to ground to make that connection. The standard automotive 5 terminal relay should be labeled with terminals 30, 85, 86, 87 and 87a.
| Code: |
1N4007
W M 54 o----------->|-------------------o
I O |
P T 31 o----o GND o----o 87a |
E O / |
R R 54d o------------/ |
30 |
|
+12 volts o----o-----------o 87 |
| |
| 86 o----o-----------o
| ( | |
| ( > |
SWITCH / ( > 1k5 ohm |
SPST / o ( > 1/4 watt |
| ( > |
| ( | |
| 85 o----o----o GND |
| |
o--------------------------o
RELAY TERMINALS 85 AND 87a TO GROUND
WIPER TERMINAL 31 TO GROUND
WIPER TERMINAL 31b IS NOT USED |
_________________
| Wildthings wrote: |
| As a general rule, cheap parts are the most expensive parts you can buy. |
|
|
| Back to top |
|
|
mrmeharry
Samba Member
Joined: January 09, 2023
Posts: 6
Location: Sun City, AZ
|
| Posted: Tue Jun 27, 2023 6:57 am Post subject: Re: Wiper wiring - Bare with me... *** UPDATE *** |
|
|
Thank you for the reply.
I have a stepdown unit, do I actually need to add a relay? If so is the relay before the stepdown or on the motor side of the stepdown? |
|
| Back to top |
|
|
EVfun
Samba Member
Joined: April 01, 2012
Posts: 6127
Location: Seattle
|
| Posted: Tue Jun 27, 2023 8:01 am Post subject: Re: Wiper wiring - Bare with me... *** UPDATE *** |
|
|
| mrmeharry wrote: |
Thank you for the reply.
I have a stepdown unit, do I actually need to add a relay? If so is the relay before the stepdown or on the motor side of the stepdown? |
The simplest method to run the wiper motor would be to just switch power on/off to terminal 54d on the wiper motor and make sure the motor is grounded (either terminal 31 or by attaching a wire to the wiper motor frame). With this simple method the wiper motor will not park, but instead coast to a stop wherever the wipers happen to be when turned off.
If you have a double pole double throw toggle switch you can wire it to duplicate the function of the stock wiper switch and avoid the relay. Here is my attempt at an ASCI art version of that.
| Code: |
+12v o------------o------o
| |
GND o----o | |
| | |
| | |
SWITCH / / |
DPDT o/ o o/ o |
| | |
| | |
WIPER o o o
MOTOR 31b 54d 54
BE SURE TO GROUND WIPER MOTOR
TERMINAL 31 OR WIPER MOTOR FRAME
|
_________________
| Wildthings wrote: |
| As a general rule, cheap parts are the most expensive parts you can buy. |
|
|
| Back to top |
|
|
mrmeharry
Samba Member
Joined: January 09, 2023
Posts: 6
Location: Sun City, AZ
|
| Posted: Tue Jun 27, 2023 11:32 am Post subject: Re: Wiper wiring - Bare with me... *** UPDATE *** |
|
|
I can live with not having the park work, So I understand that I DON'T NEED A RELAY, CORRECT ?
Thanks |
|
| Back to top |
|
|
mrmeharry
Samba Member
Joined: January 09, 2023
Posts: 6
Location: Sun City, AZ
|
| Posted: Tue Jun 27, 2023 11:36 am Post subject: Re: Wiper wiring - Bare with me... *** UPDATE *** |
|
|
| I just have a SPST switch |
|
| Back to top |
|
|
EVfun
Samba Member
Joined: April 01, 2012
Posts: 6127
Location: Seattle
|
| Posted: Tue Jun 27, 2023 1:34 pm Post subject: Re: Wiper wiring - Bare with me... *** UPDATE *** |
|
|
| mrmeharry wrote: |
I can live with not having the park work, So I understand that I DON'T NEED A RELAY, CORRECT ?
Thanks |
If you don't want the wipers park function the relay is not required. You only need to apply power to terminal 54d for the wipers to run.
_________________
| Wildthings wrote: |
| As a general rule, cheap parts are the most expensive parts you can buy. |
|
|
| Back to top |
|
|
|


