| Author |
Message |
FNGRUVN
Samba Member

Joined: October 27, 2007
Posts: 2237
Location: Fort Collins, CO

|
 Posted: Thu Mar 08, 2012 10:36 pm Post subject: Tintop to Westy pop top conversion Posted: Thu Mar 08, 2012 10:36 pm Post subject: Tintop to Westy pop top conversion |
 |
|
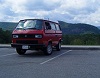
I figured a another pop top conversion thread couldn't hurt so here goes.
I scored a westy roof and pop top last summer from some gal that bailed on her project and I'm just now finding the time to start on mine. Yesterday, I pulled the headliner and the A/C stuff out and today I took the plunge and made the first cut into the roof.
I'm following in syncrogreg's footsteps here. He was good enough to post up pictures of his project. At first I couldn't figure out why he cut out the center section when he ended up attaching the westy roof to the outer edge next to the rain gutter. I'm guessing he did this so that he could set the westy roof in place and then mark around the edge so that his cut would line up perfectly with the westy roof. This would make the job of welding it in place a lot easier.
I used a center punch from inside to make two dents, about two inches apart, in the roof parallel to the inner roof frame. I used these dents to mark a line on the top of the roof so that I could use a cutoff wheel to start my cut. I made the cut just long enough for a sawzall blade to fit in. I used my sawzall from inside the van to cut along the inner roof frame. I had to use the center punch/cutoff wheel method to go around the corners and on either side of the roof braces. It went pretty quick. I had a really big sunroof in no time at all.
Tomorrow, I plan on cutting out the rear roof brace, prepping the donor roof and at least setting it in place. In the mean time, I'll be glad to take more pictures if anyone has any requests for specifics. I'd wouldn't mind any suggestions or constructive criticism.
_________________
"Democracy is two wolves and a lamb voting on what to have for lunch. Liberty is a well-armed lamb contesting the vote." - Benjamin Franklin |
|
| Back to top |
|
 |
westfailed
Samba Member
Joined: January 06, 2012
Posts: 156
Location: North of 49
|
| Posted: Fri Mar 09, 2012 4:04 am Post subject: |
|
|
| There is no turning back now good work |
|
| Back to top |
|
|
Syncroincity
Samba Member

Joined: April 15, 2007
Posts: 1557
Location: New York City
|
|
| Back to top |
|
|
rubbachicken
Samba Member

Joined: October 05, 2004
Posts: 3058
Location: socal
|
|
| Back to top |
|
|
randywebb
Samba Member

Joined: February 15, 2005
Posts: 3815
Location: Greater Metropolitan Nimrod, Orygun
|
| Posted: Fri Mar 09, 2012 4:59 pm Post subject: |
|
|
do you have the additional roof braces to weld in?
_________________
1986 2.1L Westy 2wd Auto Trans. |
|
| Back to top |
|
|
FNGRUVN
Samba Member
Joined: October 27, 2007
Posts: 2237
Location: Fort Collins, CO
|
| Posted: Fri Mar 09, 2012 6:19 pm Post subject: |
|
|
| randywebb wrote: |
| do you have the additional roof braces to weld in? |
Which ones are you talking about?
_________________
"Democracy is two wolves and a lamb voting on what to have for lunch. Liberty is a well-armed lamb contesting the vote." - Benjamin Franklin |
|
| Back to top |
|
|
DLJ
Samba Member
Joined: August 05, 2008
Posts: 561
Location: North California
|
| Posted: Fri Mar 09, 2012 6:49 pm Post subject: pop top camper conversion |
|
|
| Dont getg all hung up on roof braceing. Use the stock cross brace from the donor. Weld and your same as stock |
|
| Back to top |
|
|
edgood1
Samba Member
Joined: September 30, 2004
Posts: 2116
Location: Plymouth, MA
|
| Posted: Fri Mar 09, 2012 6:56 pm Post subject: |
|
|
| FNGRUVN wrote: |
| randywebb wrote: |
| do you have the additional roof braces to weld in? |
Which ones are you talking about? |
no additional braces are required. the "C" pillar brace on a westy is different, but theres no problem keeping the one you got if you build around it.
BUT... i don't see how its possible to swap the westy brace in without tearing out the whole roof skin at the rain gutters...there are support gussets under there that are welded in.
_________________
1987 Syncro Westfalia powered by Subaru
1963 Panel to Deluxe Bus project :::: (photo album)
'65 Westfalia |
|
| Back to top |
|
|
FNGRUVN
Samba Member
Joined: October 27, 2007
Posts: 2237
Location: Fort Collins, CO
|
| Posted: Fri Mar 09, 2012 7:12 pm Post subject: |
|
|
I took advantage of some really nice weather we're having and got the donor roof fitted by the end of the day like I hoped.
I started this morning on the donor roof. I had to trim it down so that the new edge would be in the crease just above the rain gutter.
After figuring out where I wanted to make my cuts and marking the cut lines, I used a 4 1/2", thin cut-off wheel to cut along the line. I went through quite a few wheels today, but got it all trimmed out.
Next, I cut out the rear brace. I used a spot weld cutting bit to cut around each spot weld and an old wood chisel to pry the brace away from the body.
In the next picture you can see part of the brace that is sandwiched between the inner roof frame and the roof skin. I plan on welding the edge of this brace to the inner roof frame. I hope this will add a little strength.
Next, I marked and cut along the crease just above the rain gutter. I stopped a little short of both ends. I didn't want to make these cuts just yet. All I wanted to do was get the two side strips cut out so the donor roof would sit down almost where it will be when finished. In the next picture you can see that brace that I need to weld.
Once the side strips were gone I was able to set the donor roof in place. The donor roof overlapped the van's roof at the front and rear. I marked where it overlapped, removed the donor roof, and made my cuts.
I did this a couple of times until I was happy with the fit.
Tomorrow I plan on cleaning up the edges, doing some more prepping on the donor section, welding up that brace, welding in the two brackets for the topper hinges, and hopefully start tacking the donor in place. I have to hurry. Syncro Solstice is right around the corner.
_________________
"Democracy is two wolves and a lamb voting on what to have for lunch. Liberty is a well-armed lamb contesting the vote." - Benjamin Franklin |
|
| Back to top |
|
|
ajdenette
Samba Member
Joined: February 15, 2009
Posts: 768
Location: Hope Valley RI
|
| Posted: Fri Mar 09, 2012 7:37 pm Post subject: |
|
|
I am Glad I have just been sitting on the parts to do this and have not startedyet this is a VERY clean install method. This willmean not dealing with the front and rear brazed sectins or the top of the windshild, and if we could get our hands on the west atlantic aero piece we wouldnt have to worry about the holes for the stock westy luggage rack.
_________________
1985 2wd Westy with 2000 Subaru 2.2 current driver
https://www.thesamba.com/vw/forum/viewtopic.php?t=685635
1986 Syncro Doka Project next in line
https://www.thesamba.com/vw/forum/viewtopic.php?t=732777
1990 Vanagon Syncro Base awaiting body work |
|
| Back to top |
|
|
FNGRUVN
Samba Member
Joined: October 27, 2007
Posts: 2237
Location: Fort Collins, CO
|
| Posted: Fri Mar 09, 2012 7:47 pm Post subject: |
|
|
| ajdenette wrote: |
| if we could get our hands on the west atlantic aero piece we wouldnt have to worry about the holes for the stock westy luggage rack. |
The holes shouldn't be a problem. Today, before I made the first cut, I measured off from the front of the first hump and the rain gutters to each bolt and wrote it down. When I get to this point I'll tack the brackets in place with a tiny weld so I can make sure they're positioned correctly before I drill the holes.
_________________
"Democracy is two wolves and a lamb voting on what to have for lunch. Liberty is a well-armed lamb contesting the vote." - Benjamin Franklin |
|
| Back to top |
|
|
freshintulsa
Samba Member

Joined: July 16, 2006
Posts: 229
Location: Tulsa, OK
|
| Posted: Fri Mar 09, 2012 8:03 pm Post subject: |
|
|
Looking good Rick! How are you liking the h-6? Keep posting pics of the roof swap. Looking forward to your interior too, I'm sure you have some good ideas for that.
Doug
_________________
"go slower, go lower!!!"
85 westy svx
Fresh front end rebuild
Front cab changed from brown to black with new homemade door panels, etc.
Soon to remove fridge/sink/cabinet and make custom bench seat!!!
89 wolfsburg/ bluestar.... finished the stick to automatic conversion,
tiico motor
Daily driver, 20mpgs and has enough hair in it to make a few dogs. |
|
| Back to top |
|
|
ajdenette
Samba Member
Joined: February 15, 2009
Posts: 768
Location: Hope Valley RI
|
|
| Back to top |
|
|
greggearhead
Samba Member

Joined: June 20, 2004
Posts: 579
Location: Colorado Springs, CO
|
|
| Back to top |
|
|
shadetreetim
Samba Member

Joined: January 10, 2011
Posts: 1994
Location: Riverside, California
|
| Posted: Fri Mar 09, 2012 10:42 pm Post subject: |
|
|
Nice write up. Your work is looking good. Thanks for sharing. I may have to do this myself in the future.
_________________
Tim Potts
Doing my best every time I drive it to dispel the myth these Vanagons have to be slow!
'89 Vanagon Bluestar/Country Homes 1.8T & .77 4th
'74 Jeep CJ5 |
|
| Back to top |
|
|
SL12572
Samba Member
Joined: April 13, 2011
Posts: 270
Location: Washington
|
| Posted: Fri Mar 09, 2012 10:59 pm Post subject: |
|
|
Looks great! I wish you lived in Washington, so we could convert our vans side by side. Id let you make the first cut though  . .
So if I'm seeing this correctly, the front portion of the vans roof is left in place? I was under the impression that a tin top was a domed roof and the westy was a flat roof. Does the donor westy roof line right up and blend in with the forward tin top roof?
I'm also having a hard time visualising where you would make the cuts in the front and aft. Is there a measurment, body line to use, or is it just a make it up as you go?
I recently got a 82 Westy Diesel that will be used for the conversion. Im just trying to learn as much as possible before I attempt to tackle this.
Keep up the good work and thanks for documenting it!
Scott |
|
| Back to top |
|
|
specialev
Samba Member

Joined: March 25, 2011
Posts: 282
Location: Mukilteo WA
|
| Posted: Fri Mar 09, 2012 11:48 pm Post subject: |
|
|
| Top work! I'll be watching closely. Thanks for documenting your work. On my list of things to do, just gotta find the right donor van to scrap out. |
|
| Back to top |
|
|
FNGRUVN
Samba Member
Joined: October 27, 2007
Posts: 2237
Location: Fort Collins, CO
|
| Posted: Sat Mar 10, 2012 8:45 am Post subject: |
|
|
Thanks for all the nice comments and moral support.
Hey Doug, the H6 is friggin' awesome! 80 mph the other day with a stiff headwind. I have plans for the interior but that might have to wait.
Scott - The front of a tin top and Westy are the same, starting at the first crossover brace. You can join them up anywhere in front of the holes for the back of the luggage rack. The rear is a little different. Your cut has to be behind the rear bolt hole for the pop top hinge. There's an indentation in the roof skin where the hinge bolts up. I made my cut 2 1/2" behind the rear bolt hole. This was far enough back to allow the skins to line up but close enough to be under the pop top to hide any signs of the weld.
_________________
"Democracy is two wolves and a lamb voting on what to have for lunch. Liberty is a well-armed lamb contesting the vote." - Benjamin Franklin |
|
| Back to top |
|
|
jstar89crx
Samba Member
Joined: September 19, 2005
Posts: 156
Location: Bellingham WA
|
| Posted: Tue Mar 13, 2012 7:09 am Post subject: |
|
|
| Is there a backing plate with nuts on it or are the nuts for the poptop rear hing attached directly to the underside of the donor roof? In the picture it just looks like holes with no threads inside. Keep the pictures and notes coming! Looks great so far! |
|
| Back to top |
|
|
FNGRUVN
Samba Member
Joined: October 27, 2007
Posts: 2237
Location: Fort Collins, CO
|
| Posted: Tue Mar 13, 2012 8:18 am Post subject: |
|
|
jstar - Here's some pictures to answer your question. I tried to post them up last night but ran out of time.
I worked on this all weekend but it doesn't look like I got much done. All the stupid little time consuming details.
I started by welding up that rear brace that I cut out. Not sure if this step is needed, but I figured it couldn't hurt.
Next, I prepped the pop top hinge brackets. The nuts that are on the back side are just spot welded in place from the factory. I knew with my luck one of the nuts would break loose when I got the roof welded in place so I took this time to tack weld the nuts. Belt and suspenders.
My first attempt at tacking the brackets in place came up a little short. I wasn't really happy with their alignment in relation to the roof skin. I just set the roof in place and used a sharpie to mark where the center of the nuts would be. This will allow the nuts to line up with the holes in the skin, but doesn't really tell you how high or low to set it. Set it too low and there's a gap between the bracket and the skin. This will cause the skin to dent in when you tighten the hinge bolts. Weld it in too high and the edge won't line up.
My second attempt I bolted the brackets to the roof skin and put several little blobs of that black goo (that's stuck to the roof braces) on the underside of the brackets. My plan was to set the roof in place and then unbolt the brackets from the roof and then remove the roof, leaving the brackets stuck in place. This worked like a charm. I then marked the outline of each bracket, removed the goo, and then tacked the brackets in place. Set the roof back in place and checked the alignment.
The rest of the weekend was spent prepping the donor section and the areas of the van where all the welding will be. Anywhere that would be welded that wouldn't be accessible after assembly got sanded down to bare metal and then primed with weld-thru primer. The rest of the underside of the donor got sanded, primed, and painted.
Does anyone know why there's an extra layer of sheet metal on the passenger side rail and not the driver's side. You can see what I'm talking about in these two pictures.
_________________
"Democracy is two wolves and a lamb voting on what to have for lunch. Liberty is a well-armed lamb contesting the vote." - Benjamin Franklin |
|
| Back to top |
|
|
|


