| Author |
Message |
edgood1
Samba Member
Joined: September 30, 2004
Posts: 2151
Location: Plymouth, MA

|
 Posted: Sun Jun 28, 2009 5:33 pm Post subject: Westfalia conversion project Posted: Sun Jun 28, 2009 5:33 pm Post subject: Westfalia conversion project |
 |
|
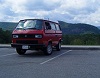
This topic is here to document my westy conversion project over the next few months.
The goal is to convert my '87 Syncro GL passenger van to as close as possible to a factory Westfalia.
The donor: A complete 1985 Westfalia. I bought this off craigslist. It has a blown motor that is pouring oil of the heads. The PO said he overheated it on the highway and lost power. Its got 175,000miles on the clock. The interior is in excellent shape. It has rust issues on the drivers side, not too bad actually. It looks like it had body work done poorly and that caused a lot of the rust.
The recipient: My '87 Syncro GL. Rust free and mechanically sound.
I plan on drilling out all the spot welds on the roof and transplanting it over to the syncro. I've already started stripping the interior and almost have it all out.
I'm taking a lot of pics for reference and I'll post them up on picasa as I go:
http://picasaweb.google.com/eddiegood/85Westy?feat=directlink
_________________
'87 Syncro :: Subaru eng
'63 Samba Conversion ::(photo album)
'65 Westfalia
'65 Bug |
|
| Back to top |
|
 |
vanagonforever
Samba Member

Joined: July 29, 2007
Posts: 211
Location: Baltimore, MD
|
| Posted: Sun Jun 28, 2009 5:45 pm Post subject: |
|
|
Man it hurts me to see such a good looking donor. The front end of that bus looks better than mine. Best of luck with the project though.
_________________
1986 2WD 2.1L WBX Vanagon Weekender
1983.5 1.9L WBX Vanagon Westfalia |
|
| Back to top |
|
|
edgood1
Samba Member
Joined: September 30, 2004
Posts: 2151
Location: Plymouth, MA
|
| Posted: Sun Jun 28, 2009 5:48 pm Post subject: |
|
|
| vanagonforever wrote: |
| Man it hurts me to see such a good looking donor. The front end of that bus looks better than mine. Best of luck with the project though. |
too bad the sides ain't so hot:
it hurts me to take apart anything salvageable... I've been looking for a good donor for a long time .. this one popped up and the price was right. this one would be a TON of work to get going again.
_________________
'87 Syncro :: Subaru eng
'63 Samba Conversion ::(photo album)
'65 Westfalia
'65 Bug |
|
| Back to top |
|
|
levi
Samba Member
Joined: February 11, 2005
Posts: 5522
Location: Las Vegas
|
| Posted: Sun Jun 28, 2009 6:01 pm Post subject: |
|
|
Interesting project.
On the only swap I've seen, he cut both midway at the pillars, then welded the pop top section on.
_________________
One of these days I'm gonna settle down,
but till I do I won't be hangin round.
Going down that long lonesome highway,
gonna see life my way
https://youtu.be/cSrL0BXsO40 |
|
| Back to top |
|
|
edgood1
Samba Member
Joined: September 30, 2004
Posts: 2151
Location: Plymouth, MA
|
| Posted: Sun Jun 28, 2009 6:17 pm Post subject: |
|
|
| levi wrote: |
Interesting project.
On the only swap I've seen, he cut both midway at the pillars, then welded the pop top section on. |
That method compromises the structural integrity of the van, and in a rollover the pillars would fail. There are strength trusses inside the outer sheet metal of the pillars that you can't weld from the outside.
I'm convinced that they only safe way to do this is to drill out the spot welds (hundreds of them) on both vans and graft the westy roof onto the syncro.
I'll take lots of pictures when I get there.
_________________
'87 Syncro :: Subaru eng
'63 Samba Conversion ::(photo album)
'65 Westfalia
'65 Bug |
|
| Back to top |
|
|
Phishman068
Samba Member

Joined: February 19, 2007
Posts: 2024
Location: Pittsburgh PA (ish)
|
| Posted: Sun Jun 28, 2009 6:22 pm Post subject: |
|
|
As someone who has done the swap (though not exactly the same way you are), I can say "Stick with it! It's worth it!"
I did only the interior swap, into a sunroof van, which had a westy top bolted too it. The interior swap is not overly complicated or even overly time consuming. You're doing the right thing by labeling everything. I used lots of ziplock bags to put screws in, then taped the screws (in the bag) to the component they belong too. Organization will be key.
I did my whole interior swap in one week, working only in evenings after work. Overall It took 40 hours or less.
The crux for me, was the floor brackets. Especially if you want to do it as close to stock as possible, it is crucial that you completely dismantle both the donor van and the recipient van to bare nothing before you can start reassembly, in order to get the floor brackets cut from the donor and welded into the recipient. Then, you can install the stock floor piece.
If I were doing it again, I wouldn't spend the time welding these brackets in. Just drill the holes, get longer bolts, and stick a nut on the other side with a pair of vicegrips on the head, and you'll still be able to tighten it down without a partner.
I would advise against cutting the holes for the 3 square "WESTY PLUGS". The only hole I cut in the side of my van was for the fridge vent flu. If I were doing it again, I wouldn't even cut this hole, and would just go strait to one of the upgraded fridges.
The reason for this is....
I still have the water tank, which I can fill with a hose through the window. It's really no inconvenience at all. And, so I don't have the city waterhookup..... big deal. Use the tank, then fill it back up!
The only one I almost partially (but really don't) miss is the 110V. I never want to be camping in range of 110 anyway.....that's not camping. So instead I removed all the 110 outlets from the westy interior and replaced them with 12V outlets. I have all these wired to my aux battery bank, and a 12v inverter I can plug into any of them if I wish. You could even get creative with making a 110 hookup if you must (Access through the drivers side door?), but I wanted to keep the holes (And thus the future rust) to a minimum. Not to mention how cool it is to have such an oddball with only that one fridge vent : )
If your using the Dometic fridge, do the upgrades while it's out!
Any thoughts comments or concerns, feel free to Pmail me. I have some good pictures too, which I might post a link to here later. If not, anyone interested can Pmail me. |
|
| Back to top |
|
|
crazyvwvanman
Samba Member

Joined: January 28, 2008
Posts: 10470
Location: Orbiting San Diego
|
| Posted: Sun Jun 28, 2009 8:37 pm Post subject: Re: Westfalia conversion project |
|
|
I think you will find that you have an 84 donor, not an 85. Won't matter much for the conversion other than the camper type screened window in the sliding door won't fit your van.
Mark
| edgood1 wrote: |
This topic is here to document my westy conversion project over the next few months.
The goal is to convert my '87 Syncro GL passenger van to as close as possible to a factory Westfalia.
The donor: A complete 1985 Westfalia. I bought this off craigslist. It has a blown motor that is pouring oil of the heads. ............ |
|
|
| Back to top |
|
|
Antron
Samba Member
Joined: July 13, 2004
Posts: 289
Location: Greenville Mi
|
| Posted: Sun Jun 28, 2009 8:39 pm Post subject: |
|
|
I did the same thing last summer and I have no regrets. I didn't graft the camper roof to the syncro though. I cut the hole and made a angle iron frame to fit the opening to carry the hinges and bed. I did graft the center brace and the area where the latch fits. The angle iron was much more stout than the sheet metal I would have used from the donor. If I had to do it again I would done the roof graft just to save the hours of finishing off the welds.
Bob
87 westfakia |
|
| Back to top |
|
|
stevey88
Samba Member
Joined: January 16, 2008
Posts: 1317
Location: Fremont, SF Bay Area
|
| Posted: Sun Jun 28, 2009 9:36 pm Post subject: |
|
|
I am just wondering. Every body drill out the spot welds but it will leave a hole. Can we just cut out the donor's roof ,turn it over and grind out the lower metal piece so it is nice and flat ? Do the same for the recipient car to get the pop top roof. Of cause you still have to drill out the roof reinforcement beams.
_________________
Steve |
|
| Back to top |
|
|
davideric9
Samba Member
Joined: January 21, 2009
Posts: 1015
Location: Oakland CA
|
| Posted: Sun Jun 28, 2009 11:01 pm Post subject: |
|
|
I have a syncro westy conversion, passenger to westfalia. The top was welded on all the way around just above the rain gutter. I doesnt look great but it also doesn't show much either. If your welding is good and your grinding is better, this is the way to go. I bought mine in this condition, then changed (changing) the interior. If you need pictures let me know.
_________________
1987 Syncro Westfalia, stock (bought 1994)
1986 Syncro Westfalia SVX, 3 knob (bought 2008)
1987 Westfalia (bought 2010)
1988 Wolfsburg GL (bought 2012) |
|
| Back to top |
|
|
remraf
Samba Member
Joined: February 25, 2007
Posts: 291
|
| Posted: Mon Jun 29, 2009 6:44 am Post subject: |
|
|
I wouldn't cut the pillars if I were going to do it.
Take a look at this flickr page. This guy drilled out all the spot welds which I've been told is the "best" way to do this conversion.
http://www.flickr.com/photos/jetstar5224/sets/ |
|
| Back to top |
|
|
Terry Kay
Banned

Joined: June 22, 2003
Posts: 13331
|
| Posted: Mon Jun 29, 2009 6:56 am Post subject: |
|
|
Drilling out the spot welds in the drip moulding, swapping tops, and spot welding the donor lid in the drip moulding is the fastest, and the most proper, physically strongest way to get this job done.
Just be sure to clean up the drip moulding tray and the bottom side of the donor lid,squeaky clean prior to dropping the new lid onto the Syncro.
It'll make the spot welding a bunch easier.
Weld thu primer on both sides will prevent any future rust out in the welded area's too.
Big job--
_________________
T.K.
Last edited by Terry Kay on Mon Jun 29, 2009 7:43 am; edited 1 time in total |
|
| Back to top |
|
|
edgood1
Samba Member
Joined: September 30, 2004
Posts: 2151
Location: Plymouth, MA
|
| Posted: Mon Jun 29, 2009 7:21 am Post subject: |
|
|
| remraf wrote: |
I wouldn't cut the pillars if I were going to do it.
Take a look at this flickr page. This guy drilled out all the spot welds which I've been told is the "best" way to do this conversion.
http://www.flickr.com/photos/jetstar5224/sets/ |
this is how I plan on doing it. That guy's pics are actually what gave me the inspiration to do this. With a lot of patience it should come together nicely. There isn't anything overly complicated about it... just LOTS of work.
I expect it to take a week of drilling (per van) just to get all the spot welds free.
_________________
'87 Syncro :: Subaru eng
'63 Samba Conversion ::(photo album)
'65 Westfalia
'65 Bug |
|
| Back to top |
|
|
Grizzly_black
Samba Member

Joined: October 24, 2006
Posts: 225
|
| Posted: Mon Jun 29, 2009 9:45 am Post subject: |
|
|
Here is my project. It is a lot of work, but worth it! Now I am installing a TDI and next I am going to replicate the cabinets with Baltic birch.
http://stellablueinmontana.blogspot.com/
It is better to grind the spot welds off of the Syncro roof and drill the welds with a special spot weld remover tool. That way you have the full rain gutter, with no holes in it, and then you just fill in the drilled holes with your weld grind seal and your done. It is a bit more complicated than that but the grinding instead of drilling your old Syncro roof off is the way to go! I tried to upload pictures but it said they were too large.
Just made it smaller. That worked! 
Good luck on your project!
Grizz |
|
| Back to top |
|
|
Grizzly_black
Samba Member
Joined: October 24, 2006
Posts: 225
|
| Posted: Mon Jun 29, 2009 9:47 am Post subject: |
|
|
I should make that more clear. Drill the spot welds with a spot weld remover on the Westy roof. Not the Syncro roof.
Grizz |
|
| Back to top |
|
|
randywebb
Samba Member

Joined: February 15, 2005
Posts: 3815
Location: Greater Metropolitan Nimrod, Orygun
|
| Posted: Mon Jun 29, 2009 11:01 am Post subject: |
|
|
"replicate the cabinets with Baltic birch"
that will be pretty, but you could replicate the cabinets with Aluminum hexcell and cut maybe 200 lbs. out of the wt.
what other mods you will be doing differently from the stock Westies? |
|
| Back to top |
|
|
levi
Samba Member
Joined: February 11, 2005
Posts: 5522
Location: Las Vegas
|
| Posted: Mon Jun 29, 2009 12:28 pm Post subject: |
|
|
| randywebb wrote: |
"replicate the cabinets with Baltic birch"
that will be pretty, but you could replicate the cabinets with Aluminum hexcell and cut maybe 200 lbs. out of the wt.
what other mods you will be doing differently from the stock Westies? |
Been in Leons, that he made with baltic birch.
Interesting van.
I like the way he moved the shifter back so that he could put a console in front of it.
http://www.thesamba.com/vw/classifieds/detail.php?id=777435
_________________
One of these days I'm gonna settle down,
but till I do I won't be hangin round.
Going down that long lonesome highway,
gonna see life my way
https://youtu.be/cSrL0BXsO40 |
|
| Back to top |
|
|
Grizzly_black
Samba Member
Joined: October 24, 2006
Posts: 225
|
| Posted: Mon Jun 29, 2009 5:16 pm Post subject: |
|
|
The birch plywood will be a bit lighter than the original. After the cabinets are done I will install a Truckfridge that Karl at westyventures.com recommends.
Other than that it will be bone stock. 
Grizz |
|
| Back to top |
|
|
freshintulsa
Samba Member

Joined: July 16, 2006
Posts: 229
Location: Tulsa, OK
|
| Posted: Mon Jun 29, 2009 6:24 pm Post subject: |
|
|
agree with grizzly here... drill out the spot welds on the DONOR top, then clean all the paint off (for health and welding reasons) of top and bottom of area near holes. GRIND the spot welds off of the SYNCRO roof, then clean the flat gutter tray on the syncro, grinding all remaining weld flat. Spray on weld thru primer on all surfaces that were cleaned up BEFORE welding. Put on donor roof skin, clamp as you weld, and be patient. This is THE way to do this. i've been involved in about 5 roof transplants now and this is the best and only true way to do this. THen when done, clean off all spot welds, use seam sealer on all edges, and paint and your DONE!!!
_________________
"go slower, go lower!!!"
85 westy svx
Fresh front end rebuild
Front cab changed from brown to black with new homemade door panels, etc.
Soon to remove fridge/sink/cabinet and make custom bench seat!!!
89 wolfsburg/ bluestar.... finished the stick to automatic conversion,
tiico motor
Daily driver, 20mpgs and has enough hair in it to make a few dogs. |
|
| Back to top |
|
|
edgood1
Samba Member
Joined: September 30, 2004
Posts: 2151
Location: Plymouth, MA
|
| Posted: Mon Jul 06, 2009 7:48 pm Post subject: |
|
|
I got the westy interior completely apart tonight. All cabinets, pop top+hardware, seats, panels, brackets and screws labeled and stored.
13 hours total work so far. Now I got just a shell of a westy. Its amazing the things you find in these things...
Aside for the usual stinky mice poop I found
a $10 bill
$4.84 in change.
The original "Rusty Jones" rust proofing paper work and warranty.... it didn't seem to help.
a bunch of CT and VT camping maps and brochures.
Lots of glass behind the sink... It looks like this van had some body work done... the entire drivers side was resprayed and theres lots of bondo... which ultimately caused all the rust.
This bus is dated 8/84 which leads me to believe its an '85... and it was registered as an 85 but it exhibits all of the qualities of an '84.
_________________
'87 Syncro :: Subaru eng
'63 Samba Conversion ::(photo album)
'65 Westfalia
'65 Bug |
|
| Back to top |
|
|
|


