| Author |
Message |
70bus 
Samba Member

Joined: July 15, 2004
Posts: 1194
Location: P.O.

|
 Posted: Tue May 13, 2025 9:56 am Post subject: Re: Rusty 65 SC restoration Posted: Tue May 13, 2025 9:56 am Post subject: Re: Rusty 65 SC restoration |
 |
|
"Mine just clears the bumper. I pinch my fingers every now and then."
FWIW, that is the way mine is; I didn't say anything because I assumed it's wrong, and you would provide the 'correct' answer and I'd adjust it!
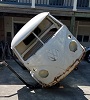
I'll try to get some measurements today but here's some pics
Lid to bumper is maybe a fat finger or two smaller ones wide. From looking at these pics, I assume my brackets are tipping bumper down towards the front; I seem to rcall stacking washers above and below to get them this good! There's a local VW meetup tonight and I'll try to see what other bumper/lid gaps look like.
_________________
Craig K
70 Neunsitzer
65 Pritschenwagen
"If Von Dutch was alive, he'd walk in there with a pistol and shoot these people." - Robert Williams
Raul the 65 singlecab
Karl the 70 nine-seater |
|
| Back to top |
|
 |
Kb65single
Samba Member
Joined: July 24, 2019
Posts: 331
Location: Obxnc
|
| Posted: Wed May 21, 2025 9:13 am Post subject: Re: Rusty 65 SC restoration |
|
|
70bus
thanks for the pictures they helped.
Driver's side guard was a little more beat up. PO's made a mess out of it. Looks like they tried to adjust it to fit the profile of the bumper but failed. Some typical dents on the face that were easy to pound out.
Welded some small repairs on both sides of the guard and it looked and fit better.
Tried on the towel bar and it didn't fit like the passenger side. Almost seemed like it was too long.
The position of the guards was different. Engine lid opening and taillight opening weren't the same distance from each other.
Measured the difference. Marked the engine lid opening.
The stance of the guards was very different also. Driver's side was straight vertical, and the pass side was slanted in at the top. I compared the front bumper, and those guards were slanted in at the top. Some pictures from the forums show both ways, but never different on the same bumper. 70bus showed them slanted in at the top. I couldn't keep it that way because it would just look weird. (The far away bumper guard is a little difficult to see because it blends in with all the crap behind it. Sorry!)
Getting the two guards symmetrical would require a bit of effort. Choose to slant the top of the guard in first and see if that would improve the position of the towel bar. Graph some metal on both sides of that guard and ground it to match the passenger side.
Unfortunately, moving the guard toward the center of the bus required moving the bumper blade bracket and drilling a new hole in the blade and plugging the old hole. Had to undo what I did to the frame bracket to center the blade in the bus. A pain in the ass but I didn't think I had a choice. Could have shortened the towel bar but that wouldn't cure the non-symmetry. More work than I wanted but ....
After I got done, I had to move the hole slightly on the side of the bumper blade. Looking more and more like a bus from the rear. Next will be the reproduction splash pans, what could go wrong.
|
|
| Back to top |
|
|
70bus
Samba Member
Joined: July 15, 2004
Posts: 1194
Location: P.O.
|
| Posted: Wed May 21, 2025 9:34 am Post subject: Re: Rusty 65 SC restoration |
|
|
Sweet! I agree the slanting-back LOOKS best... no idea if it's the stock stance. Maybe all of the slanted ones are the result of tipped bumpers! I did look around at the other buses at the meetup, and without opening a strangers lid, they looked to range from 'watch yr fingers' to a narrow but pinch-less sweep. Maybe a 1/2" in variation? My bumper tips forward, and I'm sure if I massaged that out I'd have more room for flesh in the gap.
Any ideas why your sides were so different? W/out scrolling back, I can't remember if both sides were replaced; maybe if one is OG the repro was off a smidge? Or do you think the culprit was the bumper and all of its sad history of dings?
_________________
Craig K
70 Neunsitzer
65 Pritschenwagen
"If Von Dutch was alive, he'd walk in there with a pistol and shoot these people." - Robert Williams
Raul the 65 singlecab
Karl the 70 nine-seater |
|
| Back to top |
|
|
Kb65single
Samba Member
Joined: July 24, 2019
Posts: 331
Location: Obxnc
|
| Posted: Wed May 21, 2025 12:41 pm Post subject: Re: Rusty 65 SC restoration |
|
|
| 70bus wrote: |
Sweet! I agree the slanting-back LOOKS best... no idea if it's the stock stance. Maybe all of the slanted ones are the result of tipped bumpers! I did look around at the other buses at the meetup, and without opening a strangers lid, they looked to range from 'watch yr fingers' to a narrow but pinch-less sweep. Maybe a 1/2" in variation? My bumper tips forward, and I'm sure if I massaged that out I'd have more room for flesh in the gap.
Any ideas why your sides were so different? W/out scrolling back, I can't remember if both sides were replaced; maybe if one is OG the repro was off a smidge? Or do you think the culprit was the bumper and all of its sad history of dings? |
I have no idea why the two sides were so different. 90% original metal on the corners of the bus. I'm guessing that my blade is a repro but hard to verify. No VW's stamped on the blade or brackets. The driver's side guard was just hacked on. so that is easy to explain. None of the rear bumper components are original to the bus. A true mutt bumper. Life would be so much easier with an original paint bus but then there would be nothing to do  |
|
| Back to top |
|
|
|


