| Author |
Message |
LAGrunthaner 
Samba Member

Joined: March 18, 2007
Posts: 5598
Location: 1st Coast

|
 Posted: Tue Apr 06, 2010 4:36 pm Post subject: Posted: Tue Apr 06, 2010 4:36 pm Post subject: |
 |
|
I only finished the outside of one so now I am waiting for standard glass to arrive in the mail. Once the bus is in the driveway with standard glass all the way around I can set up more equipment to work on the others in the garage and only install one at a time, over time. I am somewhat afraid of taking them apart to polish the inside. But the tool was pretty amazinf for $39.00 . I'll get a pict tomorrow.
| joe comfort wrote: |
| Linda, how did your jalousies come out using your new Harbor Freight tool ? Any pics ? How did the tool work out? |
_________________
American Red Cross Safe And Well:
https://www.redcross.org/about-us/news-and-events/...bsite.html
Maui Roadsters 
www.mauiroadsters.com
http://www.oacdp.org
| Lind wrote: |
| Have you considered simply starting with a nicer bus? I don't know what your skills are, but the race is easier if you can see the finish line. If you are not a runner, don't start off doing a marathon. |
|
|
| Back to top |
|
 |
sfspanky
Samba Member

Joined: May 19, 2009
Posts: 78
Location: Portland, Oregon
|
| Posted: Sat Apr 10, 2010 9:21 pm Post subject: |
|
|
So, I started my jalousie window restoration today. I found that soaking in CLR, along with a steel wool pad, really takes a lot of the crud off of the aluminum (mine were pretty, pretty bad!). It still took a lot of elbow grease, but I pretty much have 2 windows done in about 6 hours time. I am not including the riveting however, which has yet to be done.
Unfortunately, when I was taking the windows apart, I discovered that 4 of the glass holders were cracked. Most likely from someone not taking the glass out correctly, I suppose. Does anyone out there have any glass holders or a window with good condition glass holders to sell? Please?
_________________
'67 Double Door Camper |
|
| Back to top |
|
|
MrBusCo
Samba Member

Joined: February 13, 2007
Posts: 1576
Location: stoughton, WI
|
| Posted: Thu Jul 01, 2010 7:37 am Post subject: |
|
|
| Linda Grunthaner wrote: |
I only finished the outside of one so now I am waiting for standard glass to arrive in the mail. Once the bus is in the driveway with standard glass all the way around I can set up more equipment to work on the others in the garage and only install one at a time, over time. I am somewhat afraid of taking them apart to polish the inside. But the tool was pretty amazinf for $39.00 . I'll get a pict tomorrow.
| joe comfort wrote: |
| Linda, how did your jalousies come out using your new Harbor Freight tool ? Any pics ? How did the tool work out? |
|
Any updates Linda? I am about to start on another set and would like more "reviews" from you.
_________________
Josh The Bus Guy formerly known as JOGR
BlazeCutUSA.com MrBusCo.com |
|
| Back to top |
|
|
74 Cosa
Samba Member
Joined: June 06, 2006
Posts: 535
Location: The Midwest
|
| Posted: Tue Jul 06, 2010 2:13 pm Post subject: |
|
|
| I searched through all of this thread and did not see actual dimensions for the Jalousie glass panes. I roughly measured it at 16" x 4". I think it's 1/8" thick. Does anyone have the actual measurments? I need to replace all my laminated glass which has bubbled between the laminate. |
|
| Back to top |
|
|
74 Cosa
Samba Member
Joined: June 06, 2006
Posts: 535
Location: The Midwest
|
| Posted: Wed Jul 07, 2010 9:29 am Post subject: |
|
|
| Anybody know if it's 1/8" or 1/4" thick laminated glass? I can not find this data anywhere. It makes a big difference in cost. |
|
| Back to top |
|
|
MrBusCo
Samba Member
Joined: February 13, 2007
Posts: 1576
Location: stoughton, WI
|
| Posted: Wed Jul 07, 2010 10:22 am Post subject: |
|
|
Went out and measured a spare piece. 3/16 + 1/64 or 20 thousandths
_________________
Josh The Bus Guy formerly known as JOGR
BlazeCutUSA.com MrBusCo.com |
|
| Back to top |
|
|
jeremy57ride
Samba Member
Joined: May 23, 2005
Posts: 1336
|
| Posted: Thu Jan 13, 2011 2:11 pm Post subject: |
|
|
Thanks for all who contributed to this thread...and everret and the samba folks...the assembly continues!
|
|
| Back to top |
|
|
LAGrunthaner
Samba Member
Joined: March 18, 2007
Posts: 5598
Location: 1st Coast
|
| Posted: Thu Jan 13, 2011 7:45 pm Post subject: |
|
|
Wow awesome, your bus looks good too, more pics please, I need more eye candy 
| jeremy57ride wrote: |
Thanks for all who contributed to this thread...and everret and the samba folks...the assembly continues!
|
_________________
American Red Cross Safe And Well:
https://www.redcross.org/about-us/news-and-events/...bsite.html
Maui Roadsters
www.mauiroadsters.com
http://www.oacdp.org
| Lind wrote: |
| Have you considered simply starting with a nicer bus? I don't know what your skills are, but the race is easier if you can see the finish line. If you are not a runner, don't start off doing a marathon. |
|
|
| Back to top |
|
|
jeremy57ride
Samba Member
Joined: May 23, 2005
Posts: 1336
|
| Posted: Fri Jan 14, 2011 6:46 am Post subject: |
|
|
[quote="Linda Grunthaner"]Wow awesome, your bus looks good too, more pics please, I need more eye candy
Thanks Linda...I gotta tell yeah...I really intended to take hundreds of pictures along the way...but the large task is at hand, and I just keep on keepn' on! I decided I'd rather have a camper this spring then a scrap book! |
|
| Back to top |
|
|
74 Cosa
Samba Member
Joined: June 06, 2006
Posts: 535
Location: The Midwest
|
| Posted: Sun Mar 27, 2011 6:10 pm Post subject: |
|
|
| I purchased 1/4 inch replacement laminated glass for my windows. They work fine for the movable windows but not for the stationary smaller pane. The 1/4 inch glass won't fit in the top frame and side monting groves. Anybody else have this issue? What did you do? |
|
| Back to top |
|
|
Allmarbles
Samba Member

Joined: January 11, 2010
Posts: 2
Location: SoCal
|
| Posted: Sun Apr 03, 2011 2:15 pm Post subject: Weather-stripping? |
|
|
I'm in the process of doing my windows, and was thinking about the spaces in between the glass. Someone mentioned weather stripping.
I was thinking about using clear vinyl shower stripping.
http://www.gordonglassusa.com/item/SDTJ-1/crl-tran...rc=froogle
It's made to be water proof and make a seal between glass. It's clear, so I don't think it'd be as noticeable, but it is 1/4" thick.
Closes Gap: 1/8 to 5/32 in |
|
| Back to top |
|
|
DadaCheese
Samba Member

Joined: April 15, 2008
Posts: 848
Location: Richmond, CA
|
| Posted: Mon Nov 14, 2011 6:48 pm Post subject: Alternitives to Elbow Grease? |
|
|
Greetings,
I've read and re-read these eight pages a few times, and I am currently attempting Arod's middle-ground clean-up/restoration techniques...
The way I am reading it there are many approaches, but here's a summary of low to high:
Bottom of the barrel method would be, I imagine, putting plywood up instead of restoring your Jalousie windows.
Middle Ground restoration is Arod's excellent approach/method (page 4, on this thread, posted: Sun Sep 20, 2009 4:14 pm by Arod, with photos.)
The most complete method would be to follow a variety of the advice on here about removing any and all parts; dremeling off any and all rivets, buying the absolute best/closest matches you can, and rebuild with as many replaced parts/rivets as possible after having magical gnomes remove any and all grit and tarnish from all bits of metal.
TIME EXPENDED ~
So I've started the arduous by-hand process of using 0000 grit steel-wool with WD-40 oil and attempting to remove (from all aluminum parts of the window frame) 43 years worth of gritty oxidization... I'm only completed about 90 minutes of work on one window frame with hardly anything to show for it. I'm not lazy, and I'm not going to throw in the towel, but please, there has got to be some shortcuts to the steel-wooling the entirety of this by hand for eight hours per window(?!?!?).
Request of you!
If someone, who did find faster methods for bringing the aluminum back to its shine, could please summarize for me what tool/tools I should be using... What grinding & polishing discs/papers, what grit, what brand, wires, solvents, or the like? Your best approach for the difficult non-flat areas? When I'm all done, after I have the tools and/or methods you summarize, allowing successful completion of this project (starting with a single window), I'll post again, with pictures, and methodology...
Many thanks in advance for helping get to the nitty gritty of doing this work as efficiently as possible to save our collective sanity.
|
|
| Back to top |
|
|
bugdust
Samba Member

Joined: September 02, 2002
Posts: 606
Location: Austin, AR
|
| Posted: Mon Nov 14, 2011 7:30 pm Post subject: |
|
|
What is the purpose of the WD-40? I cleaned mine with Simple Green and 0000 steel wool then a quick polish with Mother's Mag & Aluminum polish. You could use some different compounds and pads to polish them to a mirror finish if that is the look you want.
|
|
| Back to top |
|
|
DadaCheese
Samba Member
Joined: April 15, 2008
Posts: 848
Location: Richmond, CA
|
| Posted: Mon Nov 14, 2011 8:19 pm Post subject: |
|
|
| bugdust wrote: |
| What is the purpose of the WD-40? I cleaned mine with Simple Green and 0000 steel wool then a quick polish with Mother's Mag & Aluminum polish. |
The WD-40 was suggested to use while working with the 0000 steel wool.
How long did it take to "clean" yours (before polishing), Bugdust? Perhaps Simple Green will help the corroded muck come off quicker/more easily? Your before/after picture looks great; I note that you only did the outside of the frames?
Thanks, and please (to everyone); still open for more summaries of best/easiest/quickest way(s) to clean these up without spending 8 hours per window. |
|
| Back to top |
|
|
bugdust
Samba Member
Joined: September 02, 2002
Posts: 606
Location: Austin, AR
|
| Posted: Mon Nov 14, 2011 8:27 pm Post subject: |
|
|
| I probably spent an hour per frame cleaning and polishing, plus more time cleaning and polishing the glass and putting felt spots in. |
|
| Back to top |
|
|
LAGrunthaner
Samba Member
Joined: March 18, 2007
Posts: 5598
Location: 1st Coast
|
| Posted: Tue Nov 15, 2011 5:17 pm Post subject: |
|
|
I put my steel wool on the Fein Oscillating Tool which helped a lot also with WD-40 but I haven't tried the Simple Green yet, does it work better?
_________________
American Red Cross Safe And Well:
https://www.redcross.org/about-us/news-and-events/...bsite.html
Maui Roadsters
www.mauiroadsters.com
http://www.oacdp.org
| Lind wrote: |
| Have you considered simply starting with a nicer bus? I don't know what your skills are, but the race is easier if you can see the finish line. If you are not a runner, don't start off doing a marathon. |
|
|
| Back to top |
|
|
DadaCheese
Samba Member
Joined: April 15, 2008
Posts: 848
Location: Richmond, CA
|
| Posted: Wed Dec 28, 2011 1:51 pm Post subject: "Medium" Restore of Jalouise Windows |
|
|
"Medium" restore process of one of my Jalouise Windows
Many thanks to everyone on this thread, but also many thanks to arod,
whose pictures and description on page 4 of this thread helped me
considerably for the "medium" restore (that's medium effort/professionalism) that I am documenting below.
There's things that I could/would do differently when I do it again, and/or try next time for a
more professional, more complete, restore of my windows, but in the short-term,
this is all I needed/wanted to do.
I hope the pictures and comments below (please excuse typos and misspellings) will help others.
If you are trying to do a "medium"-style restore, read through arod's
on page 4 of this thread, get the products he recommends, and then you can also
follow along with my further observations below. Enjoy.
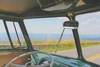
Here's the window I needed to replace first:
The replacement window I have I had bought at a SOTO (Society of Transporter Owners) meet in Southern California sometime around 1987.
It was filthy, rough from oxidation, and needed a lot of work to clean it...
The rubber is from WolfsburgWest [ http://www.wolfsburgwest.com/cart/DetailsList.cfm?ID=231069411 ],
and the rubber "Jalousie Glass Retainer Discs" can also now be bought there too.
There was some discussion on this thread of whether WD-40 was necessary or if Simple Green could also do the job.
I found that Simple Green can/does do the job (and smells a little better than the oil),
...but I also discovered that using SOS pads in the sink (a great many of them), did the work too.
Perhaps it can/will scratch compared to 0000 steel wool, I'm not sure, but I was fine with the results.
Once the eight screws are removed, you simply press (carefully) from the inside
until the window comes out/off of the door.
I am NOT an auto-body kind of guy, so I don't have the right tools, or know-how
of sanding/cleaning metal, etc. I feel I could have done this part better
(removing the old weather-strip), if I knew what I was doing.
This part (below), I found interesting. You may need to use the window's original
"spacer" frame, because if you are using a replacement window, as I was, I found that the
screw holes did NOT line up with those already in my door's frame. Hehr windows could be
bought individually and installed, once upon a time, so perhaps my replacement window
had originally be installed not at the VW factory?
I hope this picture tutorial of my experience helps anyone who is thinking of trying this, or is in the process.
Cleaning the single window took at least seven hours of the steel-wool process combined with elbow grease,
but as you can see at the start of my post, it was pretty dirty. |
|
| Back to top |
|
|
draaronr
Samba Member
Joined: December 07, 2011
Posts: 16
Location: wilmington nc
|
| Posted: Wed Dec 28, 2011 6:39 pm Post subject: |
|
|
| where are you buying the large gray gasket that goes around the window? i am going to take mine all out and strip the van for body work and repaint and will keep these in the garage and begin the project. |
|
| Back to top |
|
|
DadaCheese
Samba Member
Joined: April 15, 2008
Posts: 848
Location: Richmond, CA
|
| Posted: Wed Dec 28, 2011 6:48 pm Post subject: |
|
|
| draaronr wrote: |
| where are you buying the large gray gasket that goes around the window? i am going to take mine all out and strip the van for body work and repaint and will keep these in the garage and begin the project. |
It is included in the W.W. kit. It is actually very thin.
Link to Wolfsburg West for the seal/kit:
http://www.wolfsburgwest.com/cart/DetailsList.cfm?ID=231069411 |
|
| Back to top |
|
|
rking6
Samba Member

Joined: June 08, 2010
Posts: 140
Location: Long Beach Ca.
|
| Posted: Wed Dec 28, 2011 6:54 pm Post subject: calking strip |
|
|
| Ace hardware has the calking strip you need..It is in there RV camper section..It comes in a roll ,,I think 1/2 or 3/4 wide and not very expensive..It never hardens and is very sticky...I did mine a few years ago ,,and it continues to keep water out...Good luck !! Bob King, 63 EZ,, Long Beach, Ca.. |
|
| Back to top |
|
|
|


