| Author |
Message |
Shadd
Samba Member
Joined: January 18, 2007
Posts: 883
Location: Lancaster, Ohio

|
 Posted: Tue Jul 05, 2011 6:46 pm Post subject: Posted: Tue Jul 05, 2011 6:46 pm Post subject: |
 |
|
Steve,
This car looks amazing in bare ally! I'm loving the progress pics please keep em coming. |
|
| Back to top |
|
 |
orb666
Samba Member
Joined: December 21, 2005
Posts: 55
Location: New Malden UK
|
| Posted: Tue Aug 02, 2011 7:23 am Post subject: |
|
|
Wow Steve - that's really come on since I was last at the workshop - splendid work by Barry, loving the redesign of the back end.
See you soon - Das Drag Day maybe?
Orb |
|
| Back to top |
|
|
kiwisteve
Samba Member
Joined: March 04, 2008
Posts: 188
Location: UK
|
| Posted: Tue Aug 02, 2011 9:36 am Post subject: |
|
|
| Hi Orb! No progress since these latest shots were taken as both Barry and I have been on holiday (not together I hasten to add), but he starts on the outer shell this week so I should have an update soon. |
|
| Back to top |
|
|
faiz
Samba Member
Joined: May 21, 2008
Posts: 75
Location: Uganda/Coventry UK
|
| Posted: Fri Aug 26, 2011 9:43 am Post subject: |
|
|
Hi Steve I met you briefly at Volksworld this year when I was gushing over how much I love your Karmann and how much of an inspiration its been to mine! 
This project is out of this world! I can't wait to see more progress.
It looks beautiful, really purposeful and the back end looks spot on now.
Great work!  |
|
| Back to top |
|
|
kiwisteve
Samba Member
Joined: March 04, 2008
Posts: 188
Location: UK
|
| Posted: Thu Sep 22, 2011 6:09 am Post subject: |
|
|
Sorry for everything being so quiet over the past month, but we've been making progress. New images below of the external bodywork beginning to come together, although it's worth noting the bootlid is the mock up version that will be discarded. Cheers, Steve
[img][/img]
[img][/img]
[img][/img]
Last edited by kiwisteve on Wed Oct 19, 2011 3:32 am; edited 1 time in total |
|
| Back to top |
|
|
bally
Samba Member
Joined: April 29, 2006
Posts: 1195
Location: Melbourne, Australia
|
| Posted: Thu Sep 22, 2011 6:24 am Post subject: |
|
|
It's looking superb Steve - it really is a thing of beauty! I'm loving watching the process of putting it together; it's fascinating.
Keep the updates coming please 
Dave |
|
| Back to top |
|
|
LeviMan2001
Samba Post Whore

Joined: April 11, 2009
Posts: 3855
Location: Alaska
|
|
| Back to top |
|
|
kiwisteve
Samba Member
Joined: March 04, 2008
Posts: 188
Location: UK
|
| Posted: Fri Sep 23, 2011 1:55 am Post subject: |
|
|
| It was only a mock up earlier on to get the design "in metal". The edges and dimensions are pretty ragged if you look closely despite the finish of the main part of the panel looking okay. Barry starts on the front wing/fender today so it will be nice to get a whole side completed. |
|
| Back to top |
|
|
kiwisteve
Samba Member
Joined: March 04, 2008
Posts: 188
Location: UK
|
| Posted: Mon Sep 26, 2011 1:55 am Post subject: |
|
|
Barry has kindly detailed some of the work involved in creating panels. I don't profess to be an expert by any stretch here but thought I would post these images and commentary for your viewing pleasure....
"As mentioned, I'll leave the panels pictured above for now, even though they all need a final tickle. The basic shapes are about right, but there's a lot of fettling and finessing to do (my favourite bit actually). The reason being is that there's no point at all getting a final finish on a panel (assuming I can of course), if it turns out that the basic shape doesn't blend with the adjacent areas, and the shape of the whole is a way off. It's all a bit chicken-n-egg: it's difficult to make a call on the shape until the panels blend together well, but you don't want to invest a large number of hours in the finishing, until you're pretty certain the basic shape is right.
Anyway, as the next area to be tackled is the front wing, so that we can start to eyeball down the whole side of the car, I'll detail this. Any methods I use are simply those that I've been shown either first hand, or via books and vidoes. There are probably many, many ways of approaching this work, some better than others, some worse. It may well be the case that later on I find a better way of doing things, or try something else, only to return to this method.
The first thing I do is come up with a paper template. This is a doddle if you've got an existing panel to work with (perhaps a rough or rusty one), but much harder when coming off of a buck, as you have less to press the paper to. Usually you'll gather up loose areas and tape them, which represent areas that will need shrinking. By the same token, areas that need stretching get slits cut, and opened up.
In this case, I simply pressed the pattern onto the wireform as best I could, and taped up the creases. The neater you can do this the better, but this rather woeful attempt was plenty good enough for this example
[img][/img]
The idea of the paper pattern is that a) it gives you a template to mark around when cutting material, and b) it tells you as much as possible about where shape in the panel is going to fall. The advantage a paper pattern has over and above the jig, is that is doesn't depend on the angle of twist that a panel may have. It'll still fit the panel (and guide you), even if the panel is twisted, propeller style. Often when working with a buck only, you're tempted to just keep wheeling and wheeling, even if, in actual fact, the panel had the correct shape (shrink and stretch), just the wrong alignment.
This can be seen below: the pattern has been placed on the flat sheet, and it's clear just where the majority of wheeling needs to occur, irrespective of the position of the aluminium. It also just shows to what degree the metal needs shifting:
[img][/img]
[img][/img]
It's even more obvious with the blank placed on the buck: nearly there!
[img][/img]
Note that the metal has a degree of grain, and rather like corrogated cardboard, it will take a shape with the grain a fraction easier than across it, although this half-hard ally is fairly friendly in this respect. Even so it makes sense to work with it where possible, and this also illustrates why sometimes someone might cut into a new sheet, rather than use an offcut that at first glance would fit the bill:
[img][/img]
To return to the panel: I decided (not sure wisely or not), to attempt it in just two areas. This write up deals with the roughing out stage of the rear one. This area has some challenges: 1) to get the actual curve over the top of the wing to blend into the area head of it. 2) There is a return (reverse curve) all the way down the inner area that will blend into the 'bonnet'. There is another where the wing / bonnet blend into the scuttle. 3) The base of the wing drops into the sill, which obviously curves away underneath the car.
If all of the shapes where put in in one go, the panel would no longer clear the english wheel. Therefore I elected to get the top fitting correctly first, and then will worry about the side / arch and sill areas later.
[img][/img]
I'm forming this panel 95% on the wheel, and will just use the flipper for forming the return down the bonnet side. So all of this shaping is being done by stretching the metal. It'll probably end up being one gauge down at it's 'thinnest', but since we're starting off at 16g, we've got loads of meat in reserve. The alternatives might be to form the panel with more parts (more welding as well), or to employ shrinking as well. In this case though, shrinking would have got messy, and in fact I can't really see how you could do this without really needing a load of tidying up later.
Anyway, embryo panel as I left it yesterday. Pattern and cutting out probably took a hour and a half, wheeling to this point around six hours going carefully (better not to wheel enough, than over-wheel and have all the hassle of wheeling shape back out. You can see that the panel is still well off of the wireform (seen at the front here, but in reality it's all round, I'll keeping wheeling out the areas touching the buck until it all sits down O.K.).
[img][/img]
[img][/img]
[img][/img]
[img][/img]
[img][/img]
The next stages will involve dropping the panel hard down onto the wireform (hopefully!), then blending the shape into the side of the panel. Because of the shape, I'm going to have to put a finish on the panel before moving away from the top (it's very, very rough at the moment, which is fine, the finish starts to come when the shape is very nearly there). After that I'll move dwon the panel to blend it with the adjacent panels, and finally once all looks O.K., form the sill area (if I go that route: it may look better with the sill line going all of the way forward, and the wing sitting on top of the line: we'll see, and both options are well open)."
Enjoy. Cheers, Steve
Last edited by kiwisteve on Wed Oct 19, 2011 3:36 am; edited 1 time in total |
|
| Back to top |
|
|
kiwisteve
Samba Member
Joined: March 04, 2008
Posts: 188
Location: UK
|
| Posted: Mon Sep 26, 2011 1:58 am Post subject: |
|
|

Last edited by kiwisteve on Wed Oct 19, 2011 3:31 am; edited 1 time in total |
|
| Back to top |
|
|
Stuggi
Samba Member

Joined: October 16, 2007
Posts: 1208
Location: Jakobstad, Finland
|
| Posted: Mon Sep 26, 2011 4:07 am Post subject: |
|
|
Awesome, just truly jaw dropping. How does one even start to learn how to form metal like that? This is something I really would like to learn how to do, but so far I haven't found any way of getting any kind of start. Any tips on how to get started and somehow within the coming 50 years hopefully get half as good as you?
_________________
 1970 Beetle 1970 Beetle
 1969 Panelvan 1969 Panelvan
Orange VW Fest!
Pulled out of a Lake Fest! |
|
| Back to top |
|
|
kiwisteve
Samba Member
Joined: March 04, 2008
Posts: 188
Location: UK
|
| Posted: Mon Sep 26, 2011 4:43 am Post subject: |
|
|
| Hi Stuggi, just to clarify this isn't my work but my friend's, who is a coach builder. I too would love to be able to magic up this sort of thing, but I have to pay someone to do it unfortunately! Barry Carter who does all my bodywork is a true master when it comes to all things metal! |
|
| Back to top |
|
|
p912s
Samba Member

Joined: November 12, 2006
Posts: 48
Location: Grand Rapids, Michigan
|
| Posted: Tue Oct 11, 2011 3:26 pm Post subject: Wow and wow! |
|
|
Not sure what else could be said about this car; wow pretty well sums it up. It's history and the trouble you're going thru to properly finish what was started a 1/2 century ago is simply amazing!
Count me as one of those now following this thread.
_________________
Harig Land Speed Racing - http://www.turbokafer.com
'69 Beetle, turbo 1915
'67 912, 1720 w/Dell's; 1911 T4 under construction |
|
| Back to top |
|
|
kiwisteve
Samba Member
Joined: March 04, 2008
Posts: 188
Location: UK
|
| Posted: Wed Oct 12, 2011 12:38 am Post subject: |
|
|
| thanks mate |
|
| Back to top |
|
|
kiwisteve
Samba Member
Joined: March 04, 2008
Posts: 188
Location: UK
|
| Posted: Wed Nov 02, 2011 6:20 am Post subject: |
|
|
Sorry it's been a while. Well it was going well, but take a deep breath... after getting the right side wheeled, Barry wasn't happy with the fit, so it went in the bin! Talk about a brave move. A re-jig of the wireform buck to make it flow between the wings and doors has seen things sorted, but we're back to a naked shape and no ally
|
|
| Back to top |
|
|
kiwisteve
Samba Member
Joined: March 04, 2008
Posts: 188
Location: UK
|
| Posted: Wed Nov 02, 2011 6:25 am Post subject: |
|
|
I've never professed to be a coachbuilder or understand the detail behind making a flat panel go all curvy, so here's Barry explanation in full pulled from DDK
"Anyway .... there is rather more of a tale behind Steve's picture than his very abridged version, so pull up a chair: I'm going to tell you a story about a front wing.
As we left it, the front wing was developing nicely, although I had a niggle that the reverses (going into the scuttle and the bonnet) might bite me as the panel developed. Sure enough, on the next session, the panel started to get angry. Then I did something I really hate doing: I started another one without understanding why the first had started to go wrong. That's not quite true actually: I thought I knew.
As it happens, and luckily as it turned out, the nice people at Eckold had a last minute place on an aluminium gas welding course, to be held at the well-known (and repected) RS Panels, to be followed with a workshop tour and discussion. The gas welding element was very good: although I've done a little, this had a lots tips that were new to me. The real value though was the tour.
The upshot was that upon describing the panel, even they said they would break it into smaller parts, ideally four (front / rear inside and front / rear outside: so a hot-crossed bun essentially). That came as something of a relief, and I was keen to get back to try it.
As I'd started the second wing anyway, I cut it down a little to avoid the two return areas. After that the wheeling went very well, and at one point the fit and finish were coming togther nicely.
With this extra part coming on, a rather greater issue was rearing it's head. In my wisdom I'd made the front wing bulge out slightly when looking down the car (as well as the curve over the wing when looking from the side). Can't remember quite why I did: I must have thought it looked good. And it did, from the front and side. From the rear 3/4 though it looked as though the wing was a wart on the side of the car.
I thought I might be able to space the doorskin out from the wirefom a little, and re-wheel the wing to remove some of the direction change between the two. It became clear after rather too long, that this wasn't going to work: there was just too much metal to shift."
[img][/img]
[img][/img]
[img][/img]
[img][/img]
[img][/img]
[img][/img]
[img][/img] |
|
| Back to top |
|
|
kiwisteve
Samba Member
Joined: March 04, 2008
Posts: 188
Location: UK
|
| Posted: Wed Nov 02, 2011 6:29 am Post subject: |
|
|
| So it feels like one step forward and two back, but I know it's the right thing to have done: it wasn't right and we're doing this as much by feel and eye as anything else and if possible we want it to be the very best we can make it. So back to wheeling, hopefully we should have the side redone in 4 or 5 working days (which equates to 5 weeks as Barry only works one day a week on the project). |
|
| Back to top |
|
|
p912s
Samba Member
Joined: November 12, 2006
Posts: 48
Location: Grand Rapids, Michigan
|
| Posted: Wed Nov 02, 2011 8:22 am Post subject: |
|
|
Thanks for the update.
No doubt in my mind with the care in which you guys are approaching this project it will be outstanding when finished.
Look forward to seeing the finished panel!
_________________
Harig Land Speed Racing - http://www.turbokafer.com
'69 Beetle, turbo 1915
'67 912, 1720 w/Dell's; 1911 T4 under construction |
|
| Back to top |
|
|
Sambafraser
Samba Member
Joined: March 05, 2009
Posts: 248
Location: Hel Finland
|
| Posted: Mon Nov 07, 2011 10:18 am Post subject: |
|
|
Winter is soon upon us, this could be one way to entertain the kids.
Link
|
|
| Back to top |
|
|
kiwisteve
Samba Member
Joined: March 04, 2008
Posts: 188
Location: UK
|
| Posted: Mon Nov 21, 2011 1:58 pm Post subject: |
|
|
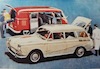
An old set of grubby rims I bought at a local auto jumble for a fiver that might go well on the car. It will mean Barry has to widen the arches slightly to accomodate them, so he's none to happy. But I thought they might look good and be a part of the future development of the car as David Small might have developed it through the 60's...
|
|
| Back to top |
|
|
|


