| Author |
Message |
BDSBSS23
Samba Member
Joined: January 03, 2008
Posts: 1817
Location: Colorado

|
 Posted: Tue Feb 28, 2012 9:48 pm Post subject: Posted: Tue Feb 28, 2012 9:48 pm Post subject: |
 |
|
| Rome wrote: |
You have picked a very ambitious project. Congratulations on your progress and determination. Great that you are taking the effort to straighten, recondition and reuse original metal for the rust repair.
While you have the pan apart, consider welding in two 10mm nuts onto the sides of the tunnel so that you can later install lap belts.
If you plan to paint your blue apron and the fenders black, consider using Rust-O-Leum gloss black via spray gun and compressor. With some practice you;'ll get decent coverage. The paint dries to a dull gloss so that it appears somewhat weathered & cloudy to match the rest of the body.
In Jan. 2007 I found the same rear interior panels as you have (green/beige) in a severely rotted Beetle in a junkyard in MA. I bought them just to have as a souvenir. That color scheme, if you get your seats to match, will look very attractive on the black body.
With the various 36hp engines you now have, you'll probably be able to pick enough pieces to put one good one together, based on the "unmolested" shortblock.
Looking forward to updates! |
Thank you for your comment. It motivates me to keep going. Actually this interior original color is blue and grey. I have most of the interior parts. Still hunting for seat covers as they are hard to find. The lap belt yes that is kinda my plan but lucky for me i have those parts from the blue 58 that i will swap to my black beauty. Pretty easy for me to do. Thanks for the advice on the paint. I just might do that but i am still considering how to get the patina on the apron, fenders. I am not worry about that right now till i finish the floor pan and the body. I am excited to show this thread to those who are in my shoes and will motivate them.
_________________
58 beetle AKA Black Beauty http://www.thesamba.com/vw/forum/viewtopic.php?t=496780&highlight=black+beauty
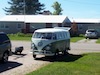
65 micro bus (project)
http://www.thesamba.com/vw/forum/viewtopic.php?t=522611&highlight=std
Pillar repair with 65 bus
http://www.thesamba.com/vw/forum/viewtopic.php?t=530360 |
|
| Back to top |
|
 |
BDSBSS23
Samba Member
Joined: January 03, 2008
Posts: 1817
Location: Colorado
|
| Posted: Wed Feb 29, 2012 3:26 pm Post subject: |
|
|
Did a little bit work to the rotisserie. I bought another engine stand from habor freight. The front was easy to bolt on and required no modifications. The rear will need some modifications. Here are some pics to give you the idea.
the front.
my other engine stand. This will give you the idea what it looks like.
I will cut off the pipe and make the hole bigger to fit the frame horn bolt.
My only concern are the engine stands are slightly crooked and so i need to make sure they both are level and perfect in order to turn the pan. One engine stand will not have the wheels on because if i do turn it, it will make it more difficult if i am doing it alone. Just might have to modify the engine stand to make it taller to make this work.
_________________
58 beetle AKA Black Beauty http://www.thesamba.com/vw/forum/viewtopic.php?t=496780&highlight=black+beauty
65 micro bus (project)
http://www.thesamba.com/vw/forum/viewtopic.php?t=522611&highlight=std
Pillar repair with 65 bus
http://www.thesamba.com/vw/forum/viewtopic.php?t=530360
Last edited by BDSBSS23 on Wed Feb 29, 2012 3:32 pm; edited 1 time in total |
|
| Back to top |
|
|
BDSBSS23
Samba Member
Joined: January 03, 2008
Posts: 1817
Location: Colorado
|
|
| Back to top |
|
|
estolze
Samba Member
Joined: March 29, 2010
Posts: 42
Location: LAKE HAVASU CITY,ARIZONA
|
| Posted: Wed Feb 29, 2012 4:40 pm Post subject: |
|
|
| great post and good idea on engine stands!! keep photos comin! |
|
| Back to top |
|
|
BDSBSS23
Samba Member
Joined: January 03, 2008
Posts: 1817
Location: Colorado
|
| Posted: Fri Mar 02, 2012 8:49 pm Post subject: |
|
|
update. removed the clutch tube and bought a new one for $8.61. Cheap and strong tube about 7 ft long. Pics
i had to cut the tube in pieces to get it out of the tunnel. Pretty much junk...
bought this few days ago. The tube on the very top of the tunnel
tab in the middle of the tunnel that holds the clutch tube will need to be replace since i broke the tab off.
inside the tunnel. If you look very closely at the bottom of the pic is where the tab used to be.
I had to think and find metal that matches the thickness and found brake tab off the donor to be the same
Finished the clutch tube work. Welded on the tunnel and ready to weld up the holes
cut the brake tab to this and bend it.
before i jump in and weld the tab on i cleaned the area to get the weld to stick well.
tab welded on
welded the tube on the front near the pedal
welded the tube on the tab
last i welded the tube to the very back of the tunnel
Thats all i have for now.
_________________
58 beetle AKA Black Beauty http://www.thesamba.com/vw/forum/viewtopic.php?t=496780&highlight=black+beauty
65 micro bus (project)
http://www.thesamba.com/vw/forum/viewtopic.php?t=522611&highlight=std
Pillar repair with 65 bus
http://www.thesamba.com/vw/forum/viewtopic.php?t=530360 |
|
| Back to top |
|
|
Buscowboy
Samba Member

Joined: October 29, 2004
Posts: 431
Location: South Coast, England
|
| Posted: Fri Mar 02, 2012 10:45 pm Post subject: |
|
|
Nice little write up. Nice to see another one being saved. Are you going to blend the paint? I hope so, I love a bit of patina. I have just purchased a heavily patina'd '62 from a junkyard and will pretty much be doing what you have done so far.
Have fun with the resto and keep the updates coming.
Regards,
Johnny |
|
| Back to top |
|
|
BDSBSS23
Samba Member
Joined: January 03, 2008
Posts: 1817
Location: Colorado
|
| Posted: Tue Mar 06, 2012 8:34 pm Post subject: |
|
|
Finished welding my tunnel. I just have to find a floor pan section since i found out the donor i had is wrong.
Pics of my finished welding.
I decided to cut off the metals that were pretty banged up and replace with cleaner metal.
cut this metal off the donor 58.
more cutting.
before i close the hole i needed to fix the inside tab in the front. The tab was broken and tack welded it up and it was sturdy enough to stay.
I accidently made the top of the tunnel dented and tried to use a stud puller, the metal was just too thick so i cut it off and reshapen it back. Welded it on.
fabicated a piece to weld and cover the hole
looks alot better. Decided to leave it for now and focused on the rear section tunnel.
welded up
went back and put a strip to fill the hole and welded it up. The tunnel job is finished. I will clean it out and pour paint in it. Once the paint is in then i will slosh it around the tunnel to make sure its covered. Thats all i have.
_________________
58 beetle AKA Black Beauty http://www.thesamba.com/vw/forum/viewtopic.php?t=496780&highlight=black+beauty
65 micro bus (project)
http://www.thesamba.com/vw/forum/viewtopic.php?t=522611&highlight=std
Pillar repair with 65 bus
http://www.thesamba.com/vw/forum/viewtopic.php?t=530360 |
|
| Back to top |
|
|
BDSBSS23
Samba Member
Joined: January 03, 2008
Posts: 1817
Location: Colorado
|
|
| Back to top |
|
|
BDSBSS23
Samba Member
Joined: January 03, 2008
Posts: 1817
Location: Colorado
|
|
| Back to top |
|
|
BDSBSS23
Samba Member
Joined: January 03, 2008
Posts: 1817
Location: Colorado
|
|
| Back to top |
|
|
BDSBSS23
Samba Member
Joined: January 03, 2008
Posts: 1817
Location: Colorado
|
| Posted: Sat May 12, 2012 4:32 pm Post subject: |
|
|
alright it has been a while since an update. I have been cleaning up the chassis and got new quarter pan for the passenger side. Worked on the rear apron as well so pretty much working slowly. Here are some pics of what i have done.
cut the pan to match the old pan since i am doing butt weld. It will be tricky and i have it welded on but i am not done yet.
old pan
a little peek at my welds on the pan
Got alot of parts from WW. Mostly seals and parts that needs replaced.
My gas tank out of the 58 surely did make a great birdhouse in the farm.... Pain in the butt to clean up but the inside was just solid and dry. I will seal it anyways since its over 50 years old.
it will needs to be cut up because the metal is wrinkled up. Too many holes and im just wasting my time trying to preserve it. I will wait til i get the new rear panel then i can go ahead and cut it up.
My 36 hp case. Cleaned up really good
_________________
58 beetle AKA Black Beauty http://www.thesamba.com/vw/forum/viewtopic.php?t=496780&highlight=black+beauty
65 micro bus (project)
http://www.thesamba.com/vw/forum/viewtopic.php?t=522611&highlight=std
Pillar repair with 65 bus
http://www.thesamba.com/vw/forum/viewtopic.php?t=530360 |
|
| Back to top |
|
|
BDSBSS23
Samba Member
Joined: January 03, 2008
Posts: 1817
Location: Colorado
|
|
| Back to top |
|
|
BDSBSS23
Samba Member
Joined: January 03, 2008
Posts: 1817
Location: Colorado
|
|
| Back to top |
|
|
BDSBSS23
Samba Member
Joined: January 03, 2008
Posts: 1817
Location: Colorado
|
|
| Back to top |
|
|
eggman95
Samba Member

Joined: October 05, 2004
Posts: 268
Location: Jersey City, NJ
|
| Posted: Thu May 24, 2012 5:50 pm Post subject: |
|
|
wow, great work so far. This is an awesome thread to follow!
_________________
Henry |
|
| Back to top |
|
|
BDSBSS23
Samba Member
Joined: January 03, 2008
Posts: 1817
Location: Colorado
|
|
| Back to top |
|
|
BDSBSS23
Samba Member
Joined: January 03, 2008
Posts: 1817
Location: Colorado
|
| Posted: Sat Jun 16, 2012 10:04 am Post subject: |
|
|
pic of the right side pan off. I drilled the spot welds off to save the pan for later.
Got the WW pan for the right side. I must say i am super pleased with it even though it has some minor details that are different from OG pans but however i am satisfied with it. It fits right on like a glove.
got the pan welded in. Had a little mistake at the start because the pan wasnt sitting on the tunnel fully so i had to drill out the spot welds then push the pan down. Better now and i am not yet done with welding the pan, need to weld the carpet pegs and battery hold down clamp and bolt for the battery hold down, jack point.
Also look what came in the mail...
very impressed with the quality and it is THICK. its from wolfparts. i will buy from them again.
Thats all i have for now.
_________________
58 beetle AKA Black Beauty http://www.thesamba.com/vw/forum/viewtopic.php?t=496780&highlight=black+beauty
65 micro bus (project)
http://www.thesamba.com/vw/forum/viewtopic.php?t=522611&highlight=std
Pillar repair with 65 bus
http://www.thesamba.com/vw/forum/viewtopic.php?t=530360 |
|
| Back to top |
|
|
sventinker
Samba Member
Joined: June 10, 2009
Posts: 1481
Location: the sandbox
|
| Posted: Wed Aug 01, 2012 9:23 pm Post subject: |
|
|
Wow thats a lot of work. good job
_________________
April 3rd 62 standard mgr/pw
374 North American equipment
Includes 6 popouts
025 Safety belts
195 Adjustable bench seat/backrest (until 1963)
| dawerks wrote: |
| Perfection only comes with delusion. |
http://www.oacdp.org/ |
|
| Back to top |
|
|
BDSBSS23
Samba Member
Joined: January 03, 2008
Posts: 1817
Location: Colorado
|
|
| Back to top |
|
|
BDSBSS23
Samba Member
Joined: January 03, 2008
Posts: 1817
Location: Colorado
|
|
| Back to top |
|
|
|


