| Author |
Message |
beardfoot
Samba Member
Joined: September 09, 2012
Posts: 31
Location: San Luis Obispo

|
 Posted: Sun Apr 24, 2016 10:26 pm Post subject: Re: My RMW suby kit build. DONE! Posted: Sun Apr 24, 2016 10:26 pm Post subject: Re: My RMW suby kit build. DONE! |
 |
|
| Thank you! This is the best. These photos are great and super easy to follow. |
|
| Back to top |
|
 |
jbnova
Samba Member
Joined: August 20, 2010
Posts: 118
Location: Ellensburg, WA
|
| Posted: Tue Oct 08, 2013 2:13 pm Post subject: |
|
|
Plus, you'll be able to get the RMW kit with a Tencent exhaust in the not-too-distant-future. An email I received from RMW said as early as winter.
http://www.thesamba.com/vw/forum/viewtopic.php?t=544047&start=40
_________________
1986 Westfalia Weekender
2wd; Bostig RG3
GoWesty (H&R) 1.5" Lift Springs + 0.5" pad in rear.
Bilstein Shocks
16" Mefros, Cooper Discoverer AT3 (215-70-16) |
|
| Back to top |
|
|
malibu
Samba Member

Joined: March 03, 2011
Posts: 116
Location: Horse Heaven, WA
|
| Posted: Tue Oct 08, 2013 1:33 pm Post subject: |
|
|
| coclimber wrote: |
| tschroeder0 wrote: |
| I'm not sure how anything could be 100% plug and play since You would always have to connect to the wires in the J(unction) box that had to be disconnected when the original harness was removed? |
Hi! I'm trying to figure out which kit to go with myself. So, I'm just relaying what I've been told about plug-n-play after several conversations with Vanaru installers & owner. I still didn't understand what each kit provides around plugging in the harness/ECU, etc.?  Which is why I'm still digging for answers here about RMW kit too! Which is why I'm still digging for answers here about RMW kit too! |
The harness is always an additional cost and you can have any company do it. Judge a kit based on the parts not the wiring. I have used small car, KEP and RMW parts and the RMW parts fit right and work without hassle. The other "kits" will require you to do a lot more figuring out then soldering 8 wires.
_________________
85 westy weekender - 2.5 suby
85 full westy - 2.2 suby - Sold |
|
| Back to top |
|
|
tschroeder0
Samba Member
Joined: April 14, 2008
Posts: 2098
Location: Boulder CO
|
| Posted: Tue Oct 08, 2013 11:45 am Post subject: |
|
|
| As I said in my write up, this a very small issue, I would not base the decision to buy or not on it. The quality of the RMW kit has proven to be excellent. |
|
| Back to top |
|
|
coclimber
Samba Member
Joined: July 18, 2013
Posts: 245
Location: Morrison, Colorado
|
| Posted: Tue Oct 08, 2013 10:16 am Post subject: |
|
|
| tschroeder0 wrote: |
| I'm not sure how anything could be 100% plug and play since You would always have to connect to the wires in the J(unction) box that had to be disconnected when the original harness was removed? |
Hi! I'm trying to figure out which kit to go with myself. So, I'm just relaying what I've been told about plug-n-play after several conversations with Vanaru installers & owner. I still didn't understand what each kit provides around plugging in the harness/ECU, etc.? Which is why I'm still digging for answers here about RMW kit too! |
|
| Back to top |
|
|
tschroeder0
Samba Member
Joined: April 14, 2008
Posts: 2098
Location: Boulder CO
|
| Posted: Mon Oct 07, 2013 7:30 am Post subject: |
|
|
| I'm not sure how anything could be 100% plug and play since You would always have to connect to the wires in the J(unction) box that had to be disconnected when the original harness was removed? |
|
| Back to top |
|
|
coclimber
Samba Member
Joined: July 18, 2013
Posts: 245
Location: Morrison, Colorado
|
| Posted: Sun Oct 06, 2013 9:14 pm Post subject: |
|
|
| tschroeder0 wrote: |
wiring harness; remember to not freak out on the hook up you are only putting together about 9 wires and it will run. just relax and take your time solder everything cover with liquid tape and then wrap with electrical tape.
|
Todd,
I would think the RMW DIY kit's harness required no soldering/taping. For instance, the Vanaru kit is 100% plug-n-play. Seems like RMW would be too. Did you have to do this because you had an older model engine? |
|
| Back to top |
|
|
ProvoCyclist
Samba Member
Joined: December 07, 2004
Posts: 642
Location: Murray, Utah
|
| Posted: Sat Oct 20, 2012 6:11 pm Post subject: |
|
|
Todd,
Thanks for posting this. Ive been out of the Vanagon scene for over a year, I had an 85 sunroof van that I put all my heart and soul in to (don't we all?), it had an SVX swap in it with the RMWesty kit.
I regret selling it every single day. Seriously.
So now I'm back in the Vanagon market, since my Passat is a total bore! I'll be doing the 2.5 with the RMW kit, so i'm really happy to have found this thread! Thanks again, and thanks for being so thorough in your documentation!
_________________
Clark
Current: 1986 Tintop GL 2wd, stock 2.1L, manual trans, Savanna Beige Metallic LH1V.
Past: 1985 Sunroof GL, 2wd, Subaru 3.3L, manual trans, resprayed to Diamond Silver L97A |
|
| Back to top |
|
|
tschroeder0
Samba Member
Joined: April 14, 2008
Posts: 2098
Location: Boulder CO
|
| Posted: Sat Aug 25, 2012 9:48 pm Post subject: |
|
|
hey all ,
sorry for not replying faster, I haven't been paying too much attention lately.
I did not use an engine stand but it would have been nice.
I went back to the stock temp sender for the dash because it reads closer to "normal" (which now means at about 3/4 when at running temp)
I did use sealer on the coolant manifold, but that's just my preferrence.
***Remember to replace your air/oil cover on the back of the engine with the metal one!!!!!
The engine runs great and I am getting really good mileage (23) even here in the mountains where most of my driving involves big climbs, I am however using oil.
This has been much discussed so I won't go over it in much detail but I believe during the winter I will be doing rings/head gaskets. If anyone has experience doing this please let me know.
*Grind- good tip on the early belt change.
Thanks,
Todd. |
|
| Back to top |
|
|
GrindGarage
Samba Member

Joined: October 14, 2008
Posts: 710
Location: Ocean City, NJ
|
| Posted: Sat Aug 25, 2012 8:09 am Post subject: |
|
|
Congrats on the swap. I have the same motor and love it. Just remember to change that belt again around 80k mi as these motors get a little extra power from the interference design. I went with all smallcar as RMW did not have the kit out yet.
_________________
-cliff
91 Vanagon AUTO
97 Single Port EJ22 all smallcar.com |
|
| Back to top |
|
|
Petervw
Samba Member
Joined: July 04, 2005
Posts: 1020
Location: Sarnia Ont. Canada
|
| Posted: Sat Aug 25, 2012 6:41 am Post subject: |
|
|
| epaddler wrote: |
tschroeder0, thanks for posting your conversion. I’m trying to decide whether to attempt this myself, order a turnkey, or pay the professionals, and this thread really helps. A few specific questions for you.
Did you purchase your engine, harness, etc., from a wrecking yard or pull it yourself from the donor car? Would you choose that route again?
If you ordered your parts from the wrecking yard, did you use the parts list that Smallcar has on its site?
I see you worked on the engine without an engine stand. Would you do that again, or invest $150 or so for a stand that rotates?
Did the RMW instructions cover prepping the engine compartment and determining what stayed and what was to be removed? |
..you will need an engine stand if you want to do the HG.. |
|
| Back to top |
|
|
BetaVan
Samba Member
Joined: September 14, 2011
Posts: 209
Location: Redwood City, CA
|
| Posted: Thu Aug 23, 2012 12:39 pm Post subject: |
|
|
| Quote: |
| Cost. I am not a keeper of receipts, I find it depressing and it doesn't matter to me as the van will never be sold. |
Love It!  |
|
| Back to top |
|
|
kalispell365
Samba Member

Joined: April 01, 2010
Posts: 889
Location: PNW
|
| Posted: Thu Aug 23, 2012 12:03 pm Post subject: |
|
|
| theDrew wrote: |
Thanks so much for this -- I'm just starting down my own path of an EJ25 conversion using RMW's pieces.
Two questions --
1.) do I need to add to the coolant manifold a sender for the dash? Or does the subaru sender work for that?
2.) I noticed you put gasket maker on the coolant manifold connection to the block -- is that necessary or are you just being overly cautious? When I pulled mine off, there was only the rubber o-rings which I replaced. Should I pull it again and add the gasket goop to it as well?
Thanks! I hope to post my very own conversion thread once I get all the pieces assembled! |
NO sealer required or recomended.as a subaru technician this almost always seems to end up where i find leaks from using sealent where it isnt needed. |
|
| Back to top |
|
|
theDrew
Samba Member
Joined: May 17, 2011
Posts: 1155
Location: Camas, WA
|
| Posted: Thu Aug 23, 2012 10:14 am Post subject: |
|
|
Thanks so much for this -- I'm just starting down my own path of an EJ25 conversion using RMW's pieces.
Two questions --
1.) do I need to add to the coolant manifold a sender for the dash? Or does the subaru sender work for that?
2.) I noticed you put gasket maker on the coolant manifold connection to the block -- is that necessary or are you just being overly cautious? When I pulled mine off, there was only the rubber o-rings which I replaced. Should I pull it again and add the gasket goop to it as well?
Thanks! I hope to post my very own conversion thread once I get all the pieces assembled!
_________________
Turbo 2276 MS3X build http://www.thesamba.com/vw/forum/viewtopic.php?t=673125
1985 Vanagon Campmobile w/ 2005 EJ25 |
|
| Back to top |
|
|
epaddler
Samba Member

Joined: July 18, 2010
Posts: 222
Location: Slippery Rock
|
| Posted: Fri Aug 10, 2012 2:13 pm Post subject: |
|
|
tschroeder0, thanks for posting your conversion. I’m trying to decide whether to attempt this myself, order a turnkey, or pay the professionals, and this thread really helps. A few specific questions for you.
Did you purchase your engine, harness, etc., from a wrecking yard or pull it yourself from the donor car? Would you choose that route again?
If you ordered your parts from the wrecking yard, did you use the parts list that Smallcar has on its site?
I see you worked on the engine without an engine stand. Would you do that again, or invest $150 or so for a stand that rotates?
Did the RMW instructions cover prepping the engine compartment and determining what stayed and what was to be removed?
_________________
1989 Syncro Westy
My build thread: http://www.thesamba.com/vw/forum/viewtopic.php?t=450246 |
|
| Back to top |
|
|
tschroeder0
Samba Member
Joined: April 14, 2008
Posts: 2098
Location: Boulder CO
|
| Posted: Fri Jun 15, 2012 11:46 am Post subject: |
|
|
Hey all, back to add some more to this. i have been driving the van with the suby for a couple of months and have logged a lot of miles. on our last long weekend we put on about 900 miles over many passes and some very hot weather. other than my leaky oil pan that I fianlly fixed by installing a gasket and not just sealer, all has been very good. Lots of power and realy good mileage 22-23!
alright:
wiring harness; remember to not freak out on the hook up you are only putting together about 9 wires and it will run. just relax and take your time solder everything cover with liquid tape and then wrap with electrical tape.
Here I am pointing at the j box and my alternator connection all wrapped up.
here are the two temp sensors I have since replaced the suby temp sensor on the left back to the stock vanagon type II sensor because of issues with the temp light coming on at random times, since then it has all been good.
here is a look at the common grounds grounded to the left side of the engine comparment and then the ground strap running to the left engine block.
Here is a look at the connection to the MAF and below that you see the two connections to the O2 sensors. There is also two plugs visible near the MAF hookup that I did not use and just zip tied them to the harness.
Let's move on to some emissions and Vacuum plumbing:
Here you see the main crankcase vent into the one way manifold valve, you can also see the main ground to the engine blcok and the plug to the TPS on the throttle body.
Here is the vac line to the fuel regulator and just above and behind it you see the socend line off the Y at the crankcase breather going to the fresh air intake tube
and the brake booster line on the right side of the engine
here you have the fuel intake and return and then on the bottom is the hard line that passes under the manilfold. On the right you will tie into the charcoal cannister and on the left you will tie into the intake manifold (there are many ways to plumb this)
Here you have the valve cover vents that run into the fresh air intake via a "t"
Here is the vac line to the manifold on the left side of the engine from the hard line underneath that goes to the charcaol cannister on the right side.
Throttle cable
This works very well, the cable supplied with the kit is long enough to use the stock cable holder and slao maintains the adjustment, very easy.
This pic sums up the exhaust very well: It's an ingeneous design. Small aluminum posts run from the front engine cover out to the heat shield and then there is one main hanger that wraps around the muffler (the heaviest piece) and goes to the heat shield. It's all nice and tidy and despite looking like it would not be solid, it is very solid.
And, there you have it, the whole package. I am very happy with everything. I found many things challenging, but once done I can say that I could do the next one without any stress at all and I would use the RMW kit again. As I said at the start of this post the kit comes with the backup of all the great guys there at RMW to put it together.
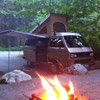
and finally back to the high mountains, fresh air and fun!
one last pic of the person who deserves a big thank you for really getting it and giving me constant support by saying yes! when no would be so much easier:)
I hope this makes someone elses install a little easier and more fun!
Thanks everyone for all the help on this when I needed it.
Todd. |
|
| Back to top |
|
|
tschroeder0
Samba Member
Joined: April 14, 2008
Posts: 2098
Location: Boulder CO
|
| Posted: Sat May 26, 2012 8:29 am Post subject: |
|
|
Thanks Dave!
Pete, yeah I will see you in WP it's only an hour away, send me the dates
Todd |
|
| Back to top |
|
|
outwesty
Samba Member

Joined: June 06, 2006
Posts: 1078
Location: Northern Sierras
|
| Posted: Fri May 25, 2012 1:45 pm Post subject: |
|
|
| Sweet Todd ! |
|
| Back to top |
|
|
GWTWTLW
Samba Member

Joined: April 22, 2008
Posts: 2174
Location: Portland, OR
|
| Posted: Fri May 25, 2012 1:33 pm Post subject: |
|
|
Sweet! Congrats Todd!
We may be heading up to camp outside of Winter Park in June after Telluride. If so, it would be fun to hook up for a beer. Not sure how far of a drive it is from Boulder but I'll get in touch.
Enjoy the ride!
Pete
_________________
89 Syncro Westy - GW 2.5, now with a double knob job
@gwtwtlw |
|
| Back to top |
|
|
tschroeder0
Samba Member
Joined: April 14, 2008
Posts: 2098
Location: Boulder CO
|
| Posted: Fri May 25, 2012 1:06 pm Post subject: |
|
|
Not really sure about the hose clamp worry, they are high quality clamps and I actually double clamp all the bigger hoses. So far I have put about 400 miles on, most up in the mountains at high temps and high revs, no leaks, no movement from anything, I have checked everything daily after any driving just to make sure. Plus all of the various pieces have an end ridge to clamp behind, if the hose is slipping off it was not tight to begin with right?
Thanks though.
jbnova- I think the kit is very well done, as I have mentioned because of my crossover year engine there were a few glitches (for example, my intake is much more like a 2.5 than a 2.2 so it required a few 2.5 pieces to route some of the engine venting, no big deal though) nothing very hard to figure out though and any phone calls I had or when I stopped by to talk to the RMW guys were handled right away with patience. I am not joking when I say how good the customer service is, and despite how close they are to me I had never met any of the RMW guys prior to starting all of this.
todd. |
|
| Back to top |
|
|
|


