| Author |
Message |
Blue Baron
VW Aficionado

Joined: June 16, 2006
Posts: 28197
Location: Free State of Florida

|
 Posted: Mon Jun 09, 2025 9:14 am Post subject: Re: Early pop out hinge part; help needed; installation Posted: Mon Jun 09, 2025 9:14 am Post subject: Re: Early pop out hinge part; help needed; installation |
 |
|
Yes, I saw that in your excellent tutorial. I did the same thing on my '56.
_________________
We are striving for perfection, to make our cars run forever, if possible.
Heinz Nordhoff |
|
| Back to top |
|
 |
panicman
Samba Member
Joined: December 18, 2011
Posts: 2639
Location: Canby, OR
|
| Posted: Mon Jun 09, 2025 8:23 am Post subject: Re: Early pop out hinge part; help needed; installation |
|
|
Thanks baron.
The part I am missing is the metallic cone bushing. In its place, a previous possessor of the latch placed a flattened brass grommet, and it does a decent job of creating tension, but not just isn't as good. Still toying with casting my own bushing.
And my bug is a 1960, so I had to just grit my teeth and drill.... |
|
| Back to top |
|
|
Blue Baron
VW Aficionado
Joined: June 16, 2006
Posts: 28197
Location: Free State of Florida
|
| Posted: Sun Jun 08, 2025 10:42 pm Post subject: Re: Early pop out hinge part; help needed; installation |
|
|
| panicman wrote: |
One of the hinges is missing 2 parts, what I would instinctively call a tension bushing, and the other is a white plastic spacer:
As you can see, the plastic spacer I do have is broken and could stand to be replaced. I scoured the classifieds for hinge parts and found none of these. |
I just posted the easy fix for the broken plastic compression washer:
https://www.thesamba.com/vw/forum/viewtopic.php?t=802873
Incidentally, all Beetles from '62 on already have the holes predrilled in the body. You just need to hold the closed mounting bracket in place and poke through the holes and through the headliner to find them.
_________________
We are striving for perfection, to make our cars run forever, if possible.
Heinz Nordhoff |
|
| Back to top |
|
|
panicman
Samba Member
Joined: December 18, 2011
Posts: 2639
Location: Canby, OR
|
| Posted: Sun Jun 08, 2025 10:17 pm Post subject: Re: Early pop out hinge part; help needed; installation |
|
|
I received the WW latch, and it does not match the original equipment.
It uses a toothed washer. No bushing.
|
|
| Back to top |
|
|
DAWGNME
Samba Member
Joined: November 14, 2012
Posts: 192
|
| Posted: Mon May 19, 2025 12:24 am Post subject: Re: Early pop out hinge part; help needed; installation |
|
|
Been waiting patiently for this! Had me scared for a min with your engine work, but here we are such a great write up and illustration once again keep up the Great work. Wished we lived in the same City LOL Keep Bugin!
_________________
Having Fun While Learning With My Build/Refresh/Just get it Driving already S*YTTT!
http://www.thesamba.com/vw/forum/viewtopic.php?t=648483&highlight=
The Rich Can Buy What Ever They Want.
But!
They Have To Beg For What They Really Need.
Now 1963, 69 BUG, Blue 67, 74 FATTY |
|
| Back to top |
|
|
panicman
Samba Member
Joined: December 18, 2011
Posts: 2639
Location: Canby, OR
|
| Posted: Sun May 18, 2025 7:23 pm Post subject: Re: Early pop out hinge part; help needed |
|
|
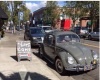
The bug bit again this spring, and I wanted to knock 2 big things off the list- early original pop out windows and getting a 36hp engine back in my 60.
The 36hp has thrown me curve balls. The pop outs went in today and went pretty smoothly.
I did the driver side first, and watched both Valone's video, as well as JBugs beforehand. That went well, so I took time to take some pictures of the process on the passenger side.
First, the glass had to come out. My glass is nice, and the rubber and chrome are all in good shape from a lazy garage life. Instead of cutting, I used a 100# suction cup on the outside of the glass (which a helper hung onto), and I got in and did a leg press against the inside of the glass. You can see the seal start to give, and then boom, it's done. The helper just sets the glass down.
With glass out, you need to trim the headliner material back enough to mount the front hinge. It's not an actual hinge. It's just a metal bracket that has enough give to behave like a hinge. I held the new glass in place to gauge where the front mount would need some clean real estate, marked the top and bottom, and then started trimming. Touching my mohair headliner with a blade was a real treat. I think I'd have rather held it against a vein.
Once there's a place to do it, get help and mount that front hinge in place, pressing the new window into the opening to simulate it being closed and sealed all the way. I used a mallet and a small block of wood to get the new glass fully seated forward. Use a spring punch to dimple the steel, and then drill.
Once the holes are drilled, slide the threaded plate into place, and use a plastic pry tool or a screwdriver to get it into position. Run the short screws into the top, middle, and bottom threads. Leave the 2nd and 4th for later.
Look inside and outside for good fit.
Time for the latch. Multiple pucker factors here: wrong position and the window won't seal, or the latch won't lock. Or, you get careless drilling and you punch a drill bit through the outside skin of the car.
I got a helper to push the new glass in while I positioned the rear hinge and worked it through its motions. Once I felt like it was in the right spot, I marked one mounting hole, and then drilled.
I ran the bit all the way into the chuck, and then used a plastic spacer so that only a half inch or so of the drill bit could penetrate the body. It worked smoothly. I ran the first screw into the rear mount and verified that the latch was working as it should.
Then, I used the punch and drilled the remaining holes for the rear mount, leaving the mount in place as a guide. I then threaded all the screws in place and tightened.
With the window installed, time for the window bead and hinge cover.
The window bead goes on easily. I started at the bottom of the front hinge and worked my way around, seating it fully with medium mallet strikes, paying close attention at all corners.
The bead is cut a bit long, so you need to cut it to length as you finish routing it.
Now the hinge cover goes on, and it threads into the remaining hinge plate holes.
Done! 13 years of wishing I had done these earlier, and I have them now. |
|
| Back to top |
|
|
panicman
Samba Member
Joined: December 18, 2011
Posts: 2639
Location: Canby, OR
|
| Posted: Sun May 18, 2025 6:20 pm Post subject: Re: Early pop out hinge part; help needed |
|
|
Huge thanks Cabrio!!!! I am going to order one of those- the price is just not too bad and one of my latches is pretty pitted and has the missing tension bushing.
I actually got around to throwing my pop outs in today! I took pics in case someone wanted yet another perspective on the process. |
|
| Back to top |
|
|
56Cabrio
Samba Member

Joined: May 22, 2008
Posts: 2054
Location: San Fernando Valley, CA
|
|
| Back to top |
|
|
panicman
Samba Member
Joined: December 18, 2011
Posts: 2639
Location: Canby, OR
|
| Posted: Thu Mar 13, 2025 8:20 am Post subject: Re: Early pop out hinge part; help needed |
|
|
| They were included with the windows and I think they had been stored with them, boxed for some time, so it's possible they shrank a little. They are WW seals. New pinch welt arrives today, so I may take a stab at these this weekend. |
|
| Back to top |
|
|
DAWGNME
Samba Member
Joined: November 14, 2012
Posts: 192
|
| Posted: Thu Mar 13, 2025 6:40 am Post subject: Re: Early pop out hinge part; help needed |
|
|
DAWGNME, when I installed my seals, there is no contour to them. They are just straight up and down.
Now those look really nice and straight I have seen ones that have curved edges. (there's even no bacon like they call it) where did you purchase your seals. Great work and very informative!
_________________
Having Fun While Learning With My Build/Refresh/Just get it Driving already S*YTTT!
http://www.thesamba.com/vw/forum/viewtopic.php?t=648483&highlight=
The Rich Can Buy What Ever They Want.
But!
They Have To Beg For What They Really Need.
Now 1963, 69 BUG, Blue 67, 74 FATTY |
|
| Back to top |
|
|
panicman
Samba Member
Joined: December 18, 2011
Posts: 2639
Location: Canby, OR
|
| Posted: Wed Mar 12, 2025 10:26 pm Post subject: Re: Early pop out hinge part; help needed |
|
|
Mukluk, thank you for the Tech bulletin AND the rubber stopper idea. I think that might work.
DAWGNME, when I installed my seals, there is no contour to them. They are just straight up and down.
|
|
| Back to top |
|
|
DAWGNME
Samba Member
Joined: November 14, 2012
Posts: 192
|
| Posted: Wed Mar 12, 2025 2:14 pm Post subject: Re: Early pop out hinge part; help needed |
|
|
| panicman wrote: |
| That's the part that is going to wreck my sleep. I am sooo not eager for that part. |
Trust and believe I am not eager also, but my question will be is there a right or wrong way to install the seals. Curve to the inside to the car or the other way around?
_________________
Having Fun While Learning With My Build/Refresh/Just get it Driving already S*YTTT!
http://www.thesamba.com/vw/forum/viewtopic.php?t=648483&highlight=
The Rich Can Buy What Ever They Want.
But!
They Have To Beg For What They Really Need.
Now 1963, 69 BUG, Blue 67, 74 FATTY |
|
| Back to top |
|
|
mukluk
Samba Member

Joined: October 18, 2012
Posts: 7452
Location: Clyde, TX
|
| Posted: Wed Mar 12, 2025 10:03 am Post subject: Re: Early pop out hinge part; help needed |
|
|
I wonder if a test tube rubber stopper could be adapted to replace the missing latch bushing.
You're almost there...
_________________
1960 Ragtop w/Semaphores "Inga" |
|
| Back to top |
|
|
panicman
Samba Member
Joined: December 18, 2011
Posts: 2639
Location: Canby, OR
|
| Posted: Mon Mar 10, 2025 9:03 am Post subject: Re: Early pop out hinge part; help needed |
|
|
| That's the part that is going to wreck my sleep. I am sooo not eager for that part. |
|
| Back to top |
|
|
Bub
Samba Member

Joined: June 10, 2004
Posts: 1302
Location: Central Washington
|
| Posted: Mon Mar 10, 2025 7:41 am Post subject: Re: Early pop out hinge part; help needed |
|
|
I'd love to see any method you come up with for locating the rear-latch part that screws to the body. That's a horrible thing when you have a fresh headliner...even with no headliner I don't like it.
_________________
| hitest wrote: |
| Had a girlfriend once who shall we say, nearly arrived at the mere sight of a semaphore in action- easy to please she was... |
|
|
| Back to top |
|
|
panicman
Samba Member
Joined: December 18, 2011
Posts: 2639
Location: Canby, OR
|
| Posted: Sun Mar 09, 2025 7:44 pm Post subject: Re: Early pop out hinge part; help needed |
|
|
Thanks!
No, the old brittle seals fortunately came out easily and cleanly. I carefully made a slice along one side of the "spine" of the seal, maybe 4 inches long and tried pulling, and out it came, and then I just pulled it out of the joint all the way around.
I did clean the channel with lacquer thinner and paper towels. Then I slowly worked the frame across a polishing wheel on my bench grinder. I started with fine polish, and worked up to coarse. I was able to easily remove all oxidation and almost all the scratches.
I fear this has been the easy part. Now I need to work up the cajones to actually start drilling holes in the car. |
|
| Back to top |
|
|
DAWGNME
Samba Member
Joined: November 14, 2012
Posts: 192
|
| Posted: Sun Mar 09, 2025 6:38 pm Post subject: Re: Early pop out hinge part; help needed |
|
|
I have to say Great work! love the way the parts turned out.
Were the old seals hard to remove and did you polish the frames also? I am trying to follow along with you to get mine done.
_________________
Having Fun While Learning With My Build/Refresh/Just get it Driving already S*YTTT!
http://www.thesamba.com/vw/forum/viewtopic.php?t=648483&highlight=
The Rich Can Buy What Ever They Want.
But!
They Have To Beg For What They Really Need.
Now 1963, 69 BUG, Blue 67, 74 FATTY |
|
| Back to top |
|
|
panicman
Samba Member
Joined: December 18, 2011
Posts: 2639
Location: Canby, OR
|
| Posted: Sun Mar 09, 2025 5:04 pm Post subject: Re: Early pop out hinge part; help needed |
|
|
| Thanks Teeroy! Now that you say that, it dawns on me that I see 'latches' used more than 'hinges'. |
|
| Back to top |
|
|
Teeroy 
Samba Member

Joined: April 20, 2003
Posts: 3842
Location: Eastern WA
|
| Posted: Sun Mar 09, 2025 4:28 pm Post subject: Re: Early pop out hinge part; help needed |
|
|
Search for pop out latch parts not hinge, might have better luck if there is anything out available.
_________________
Pres. Rivercity VW Club www.rcvwclub.org
Founder Derr Wheat Panzers (DWP)
ARR #3
www.autosportsnorthwest.org |
|
| Back to top |
|
|
panicman
Samba Member
Joined: December 18, 2011
Posts: 2639
Location: Canby, OR
|
| Posted: Sun Mar 09, 2025 12:57 pm Post subject: Re: Early pop out installation; panicman's questions |
|
|
I got the pop outs in pretty good shape, but the old seals were cracked and brittle. Also, no pitting of the frames, and the hinge chrome is in decent enough shape, so with some disassembly, then cleaning and polishing them, I think they look good.
Here they are with most hardware removed and the old seals cut out.
I polished each piece of chrome in a bench grinder with a buffing wheel. The knobs I cleaned and soaked in detergent and then hand polished with rubbing compound, then I waxed everything.
Getting ready to install the new seals.
I first carefully buffed the frames on the wheel, and got them remarkably clean and bright.
The seals went on pretty easily with a plastic trim tool. I reassembled everything, and am happy with how they turned out.
I still plan to find that correct part for the hinge tensioner, but that can be done anytime.
Now it's time for me to gather my guts and install these. The car interior still looks like the day I installed the cloth headliner and windows, so I'm not eager to start kicking glass out and cutting the fabric.
But it must be done! |
|
| Back to top |
|
|
|


