| Author |
Message |
Brendel20
Samba Member
Joined: October 21, 2010
Posts: 301
Location: Troy, IL

|
 Posted: Mon Dec 03, 2012 10:23 am Post subject: Posted: Mon Dec 03, 2012 10:23 am Post subject: |
 |
|
I've recently replaced all the rubber on my windows and have a problem. I can't get my vent windows to close with the new rubber being so stiff. I've tried a heat gun with a little luck but still am about 1/2 in. from my latch catching my striker plate. I used WW seals. It seams the seal that sits in the frame is too thick. Specifically, the lower portion around the striker plate and pivot.
Any ideas??? |
|
| Back to top |
|
 |
2true
Samba Member

Joined: December 13, 2004
Posts: 1218
|
| Posted: Mon Dec 03, 2012 10:57 am Post subject: |
|
|
Another Vote for the 3M Rubberized Electrical Tape. Screw those Repop Seals! 
_________________
AKA Destroyer of the Rants...... |
|
| Back to top |
|
|
BarryL 
Samba Member

Joined: November 01, 2004
Posts: 15251
Location: Casa de Oro, California
|
| Posted: Mon Dec 03, 2012 7:18 pm Post subject: |
|
|
| Isn't he talking about the big rubber that is in the stationary frame part? |
|
| Back to top |
|
|
Brendel20
Samba Member
Joined: October 21, 2010
Posts: 301
Location: Troy, IL
|
| Posted: Mon Dec 03, 2012 8:23 pm Post subject: |
|
|
| BarryL wrote: |
| Isn't he talking about the big rubber that is in the stationary frame part? |
Yes, he is |
|
| Back to top |
|
|
KevinAlbrecht
Samba Member

Joined: March 07, 2002
Posts: 991
Location: Ocean City > Boca > Pompano > Kirkland > Eugene > Sarasota
|
| Posted: Mon Dec 03, 2012 8:38 pm Post subject: |
|
|
| Brendel20 wrote: |
| BarryL wrote: |
| Isn't he talking about the big rubber that is in the stationary frame part? |
Yes, he is |
He waa replyin to my response about the rubber tape.
Getting the seals to seat on the frame sux. What I can offer is to make sure the seal iz seated in the frame all the way down. Once you are certain you have it seated correctly, spend more time on it.
I had to leave the vents closed for quite awhile in order to have them be broken in.
_________________
Kevin Albrecht
1963 Panel
Don't forget those seat-belts!
Click to view image |
|
| Back to top |
|
|
splitpile
Samba's Worst Speller
Joined: May 03, 2000
Posts: 5928
Location: back to living where hell meets the suface
|
| Posted: Mon Dec 03, 2012 11:11 pm Post subject: |
|
|
There are areas of the big vent seal that need to be trimmed before installing to get them to sit in the frame correctly
_________________
Stocking distributor of "The Funky Green Panels"
www.BUSTORATION.com metal and more for your bus
"no more hacking my sig line" |
|
| Back to top |
|
|
oldvolkz
Samba Member

Joined: September 28, 2005
Posts: 321
Location: Hollister, Califaztlan
|
| Posted: Tue Dec 04, 2012 12:07 am Post subject: |
|
|
http://www.youtube.com/watch?v=trzHLG1BUEQ&fea...5aDzmP-LQq
check this guy out. I've got a lot of info from Chris. I haven't used this method or any method for the vent windows, but it sure seems easy.
I hope this will help you.
-oldvolkz
_________________
"if you want peace, you must work for justice" |
|
| Back to top |
|
|
Brendel20
Samba Member
Joined: October 21, 2010
Posts: 301
Location: Troy, IL
|
| Posted: Tue Dec 04, 2012 6:15 am Post subject: |
|
|
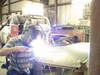
Here's what I'm working with.....
|
|
| Back to top |
|
|
Big Bill
Samba Member
Joined: June 21, 2005
Posts: 1802
Location: Fortuna Calif.
|
| Posted: Tue Dec 04, 2012 6:47 am Post subject: |
|
|
| It has been awhile since I have done a wing window seal, but if you make a small wooden drift(that fits in the channel of the seat)might help you seat the seal. It is harder to do with the glass in but you might be able to fit it in there and gentley seat it. Iam talking about the seal in the main frame itself. |
|
| Back to top |
|
|
SkooobaSteve
Samba Member
Joined: March 23, 2005
Posts: 3152
Location: Dothan Alabama
|
|
| Back to top |
|
|
SkooobaSteve
Samba Member
Joined: March 23, 2005
Posts: 3152
Location: Dothan Alabama
|
|
| Back to top |
|
|
Bulli Klinik
Samba Member

Joined: January 16, 2005
Posts: 2213
Location: Bulli Klinik, Colorado Springs
|
| Posted: Tue Dec 04, 2012 7:44 am Post subject: |
|
|
| Brendel20 wrote: |
I've recently replaced all the rubber on my windows and have a problem. I can't get my vent windows to close with the new rubber being so stiff. I've tried a heat gun with a little luck but still am about 1/2 in. from my latch catching my striker plate. I used WW seals. It seams the seal that sits in the frame is too thick. Specifically, the lower portion around the striker plate and pivot.
Any ideas??? |
Spray the seating portion of the seal with some lube, then push the tail end of the glass in as you push the front, frame side out to close it as much as possible. If it doesn't seat, you may need to bump the latch retainer in a bit or even grind a little of the inner part of the latch away. Then close them for a couple-few months until it beds in. Good Luck!
_________________
PM me about quality metal-work on your vehicle.
Mike K
Bulli Klinik
Colorado Springs |
|
| Back to top |
|
|
Bryan67
Samba Member
Joined: January 01, 2003
Posts: 2962
Location: Fresno, Ca.
|
| Posted: Wed Feb 06, 2013 12:02 am Post subject: |
|
|
I just had a local glass shop do my vents for my 68 bus. Thay have done a few sets for me in the past. At ten bucks each I`ll let them do it.
_________________
If you`re going to do something, do it right. |
|
| Back to top |
|
|
Spiderwebb
Samba Member
Joined: June 04, 2012
Posts: 14
Location: Eugene, OR
|
| Posted: Sat Mar 30, 2013 3:40 pm Post subject: |
|
|
this might be a better thread to put this on so here it is again...
just did my 1st vent window rebuild and all was easy
used electrical tape two layers
waiting 24 hrs until I remove it from the jig to make sure the glass stays put...
had to use some hair spray to get the glass to stay put after removing from the jig
tinted glass, powdercoated parts and WW repop latch
jig
electrical tape trick
pressing it all together slowly with hair spray
'64 SC
Last edited by Spiderwebb on Sat Mar 30, 2013 9:14 pm; edited 1 time in total |
|
| Back to top |
|
|
Paul Botello
Samba Member
Joined: October 18, 2008
Posts: 46
Location: Temecula
|
|
| Back to top |
|
|
Spiderwebb
Samba Member
Joined: June 04, 2012
Posts: 14
Location: Eugene, OR
|
| Posted: Sat Mar 30, 2013 6:14 pm Post subject: |
|
|
| Paul Botello wrote: |
| How do you trim under the swoosh??? |
since I used electrical tape I didn't have to do much if any trimming
make sure that you use a least 2 layers of that tape and a bit more on the top of each vent glass... mine needed 3 layers on the top and down the back side to get the glass nice and tight.
I used hair spray instead of soapy water since I heard that is better = tacky / sticky once dry... leave the glass under pressure over night to make sure it stays put once out of the jig.
If you can file the inside of the latch corners so it is smooth = won't pull off the tape while your pressing in the glass. happened to me |
|
| Back to top |
|
|
OldVolks67
Samba Member

Joined: August 18, 2010
Posts: 161
Location: Boston Metro West
|
| Posted: Sat Mar 30, 2013 8:06 pm Post subject: |
|
|
| I am in the process of doing my windows as we speak 1 down 1 to go. I totally agree about the 3m rubber electrical tape! Its definetly the way to go, looks nice and clean and easy to work with. I tried the WW rubber and it just wasn't working out no matter what I tried. So I applaud the man who came out with this idea and posted it to help us all out! Thanks |
|
| Back to top |
|
|
Scooterboyd
Samba Member

Joined: January 18, 2009
Posts: 342
Location: Rancho Cordova, California
|
| Posted: Sat Mar 30, 2013 8:17 pm Post subject: |
|
|
I just walked in a minute ago after doing both for my bus trailer and wished I saw this earlier. I used a bicycle innertube. What a hassle. Go with the tape method!!
_________________
President of "Society of Unappreciated Overachievers"
62 - 23 Window Bus
60 - Karmann Ghia Convertible
59 - Convertible Raceable Baja Bug
63 - Dune Buggy
65 - Single Cab |
|
| Back to top |
|
|
matthew henricks
Samba Member

Joined: January 02, 2002
Posts: 1359
Location: So. Cal
|
| Posted: Fri Nov 22, 2013 1:32 pm Post subject: |
|
|
This is how i trim under the swoosh. Has worked well for the 4 buses i have restored.
- Take a #11 x-acto knife blade. A brand new, sharp one.
- Heat the tip with a torch and bend over 90 degrees the tip about 1/16" back.
- Got to do this quick so you do not dull the tip with the flame and you need as tight of a bend as close to 90 degrees as you can. You are annealing the metal in order to bend it which also means the blade will not last as long.
- Put the blade in a x-acto holder and use it to get down behind the swoosh and trim the rubber.
I have also thought about trying it with the #9 retractable blade as it is smaller.
Works well. You have to get used to manipulating the handle so the blade stays perpendicular to the class and the cutting edge stays in line with the edge of the frame. You also have to be careful not to scratch the glass getting the tool in and out and not remove paint from the frame or swoosh while you are working in there. Usually takes about 5 minutes to finish the job and usually pretty clean cut.
I would post a picture if i had one....
No to find someone local who has a home made press as i have a latch that needs replacing..... |
|
| Back to top |
|
|
kirbyland
Samba Member
Joined: December 17, 2010
Posts: 287
|
| Posted: Tue Nov 11, 2014 8:57 am Post subject: |
|
|
| do you have to make a jig for both R/L sides? Seems the latch would cause issues?- |
|
| Back to top |
|
|
|


