| Author |
Message |
nod7
Samba Member

Joined: July 14, 2010
Posts: 160
Location: Seattle

|
 Posted: Sat Feb 12, 2011 12:50 am Post subject: The Dawn Treader Pop Top Restoration (Tons of pics) Posted: Sat Feb 12, 2011 12:50 am Post subject: The Dawn Treader Pop Top Restoration (Tons of pics) |
 |
|
Well, here's another project that took longer then I expected. I even ordered parts in advance so I would have everything I needed however, the tent from GoWesty arrived defective and so, I sent it back and went with a better make from http://www.atelierspk.com/english.html. So, all in all this Pop-Top restoration took a month and a half. I started it on Dec. 24th and just finished it. The final step was putting some new velcro on the sun roof area for the screen.
The quality of the tents from www.atelierspk.com is a notch above everything else out there and was well worth the wait. To give you an example, both tents were acrylic, but, the Sunbrella was cut with a hot knife vs scissors as a result, it had no frays anywhere. The install was as easy as it gets. The directions tell you to measure the front and back and leave a mark in center. I went to do that and found there was already a mark there. So, that's where your first screw goes. Once you have that, the rest just fall right in line.
I removed and replaced top by myself. It's dangerous and I did scratch my hatch getting it of and made a wear mark on the top paint putting it back on. Also, when I went to put it back on, I didn't tape up the tent like I told myself to do and, while trying to get the tent out from underneath it, the entire pop top almost fell to the concrete. Be sure to tape up your tent so it's not in the way when you are putting the top back on.
This was really Phase 2 of the Rust War. There were lots of spots of rust that I treated with navel jelly and repainted or Por 15'd. esp where the back of the pop top lands. It wears that area out pretty bad so, I put a layer of clear Lamin-X there.
To start the process, I took The Dawn Treader down to my garage at work. I have covered parking in my apartments but, I needed more room. Here it is down in the garage in a spot where the ceiling is high enough to pop the top. I've just removed the bottom screws of the tent.
Here's some pictures after I took the luggage rack off. Boy, it's dirty in there.
OK, so this is how I removed the Pop Top. After undoing all the screws, bolts etc, I pushed the top back over the push bar for popping the top. I then backed my truck up to the van. Once I had pushed the top back far enough, I got in the pickup bed and pulled it in.
What this picture doesn't tell you is that I had to lean the top against the hatch back and it scratched it. I did this so I could go put the truck in Neutral. This way while holding the top, I was able to push the pickup forward. The result is the below picture and the picture of the scratch below that.
The scratch
There she is, nekkid!
Here's the top after I got it back from paint. I'm planning on adding Carat Trim to my Vanagon and I want the top to match it.
Here's my new sunroof after I used Dap Caulking on all the screws etc. I did use the Dap Caulking listed below for it's seal that goes on the pop top. Bentley talks about a silicon sealer.. that's a bad idea. Butyl is the way to go. Read about the cualking below.
Here's the stuff. DAP Brand Gutter and Flashing Caulking Butyl Flex Rubbber Adhesive. You want the caulking to stay tacky and flexible over time. That way as the body flexes, the caulking flexes with it AND, reseals. Silicone won't do that.
Here's the stuff to make cleaning it up easier. Goo Gone;
I painted everything. I probably didn't need to but, I had it off and I had the paint on the shelf so, Painted the bars and the hinges with Rustolium Hammered look paint and baked them in the oven.
Some pictures of my stainless steel screws installed. I used the Cualking on each screw then I used GOOGone to wipe off the extra caulk. that stuff works great.
Here's the Flocking after a good treatment of Tilex. The pop top was acutally still in the pickup bed when I did this. I put on a mask, crawed underneath it in my pickup bed and sprayed it down. I tried to do it fast so I didn't get poisened by all the Tilex vapors. I then wasn't sure how I was going to rinse it. Getting it rinsed with a spray bottle would take too long. The Tilex would likely kill me. I thought about it a minute and off to the Pay N Spray car wash I went. The spray wand's pressure would be too much but, it has so much pressure that water is comming out even when you don't pull the trigger so, I just added coins and let the light spray rinse it. Left it over night to dry. Done.
Um, This is what my frontroom generally looks like. In case you haven't guessed by now, I'm single. 
I want to be able to put a toolbox or even luggage up in the luggage rack. I figured the paint would get scratched up. I had some leftover WURTH Stone Guard (Grey) from coating my Propane tank. It made a great lining in my luggage rack. Here I'm taping it off and getting it ready for the spray on stone guard.
Here's some pictures after the stone guard is applied;
I saw on here that poeple put screens in the luggage rack holes to prevent leaves and stuff from building up under it. This way, water can pass through and drain but, leaves and stuff won't get down in there. So, off to Ace Hardware I went and bought two bags of them. I believe they are for garden hoses. The epoxy in the picture with the screens wasn't made for rubber and so failed. After a day of drying the Washers came right back off. It did create a perfectly flat surface shaped to fit the rubber portion of the washer. I ended up using Locktite Ultra Gel. It says it works on Rubber and it did work well. In fact it bound the rubber to the layer of the epoxy that had failed me. Oh and It says its weather proof.
I put some duct tape over them to hold them tight while the glue dried.
Here's the stuff that worked Locktite Super Glue Ultra Gel;
Pictures of the screens. They're a perfect fit. Like they were made for it.
Pictures after the new stainless steel tie down brackets were installed. The Previous Owner of my Westy gave me these in a bag when I bought it. That was great because these are spendy.
Below is a picture of it with the seal on it. I went with the kit from Bus Depot because their kit is the only one that doesn't use the same material for the luggage rack that it uses for the pop top seal. This is important because the seal of the pop top has an extra liner in there and will prevent water from draining back out. The PO had installed one with an extra liner and it cuased several rust spots. I had to do lots of work remove all the rust. Navel Jelly, Por15, Paint etc.
When installing your seals, try to push the seal back on itself while fitting it on to the fiberglass edge. This will give you more seal on your install and should help to prevent UV shrinkage. Well the shrinkage will happen but, it just won't show as bad. Previous to the picture below the seal was actually covering the edge of the luggage rack half way over the part that the pop top covers. I undid it and Pushed it in on itself as I applied it to the fiberglass edge. If ever my seal shows shrinkage. I can pull it off and uncompress some of that slack I've pushed into it. So, I theorize anyhow.
Here she is with the luggage rack back on here while I waited for the new tent to arrive.
Tent arrived and installed. Time to put the pop top back on! Same process only in reverse.
And here we have the new tent installed. I took this one right after I had put all those screws in. The corners are the hardest. I mean, drive you to drink. Patience is the key.
Here's a before and some after photo's
Of course the name of my ship has been placed aft;
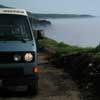
The final Results
_________________
My Projects
Propane Rework & Rust Prevention
Pop Top & Tent Restoration
House Battery, Yandina, Xantrex & Atwood Install
Last edited by nod7 on Wed Mar 02, 2011 7:11 pm; edited 18 times in total |
|
| Back to top |
|
 |
Timwhy
Samba Member

Joined: January 01, 2009
Posts: 4103
Location: Maine
|
|
| Back to top |
|
|
campism
Samba Member
Joined: September 07, 2007
Posts: 4722
Location: Richmond VA
|
| Posted: Sat Feb 12, 2011 3:12 am Post subject: |
|
|
| Great how-to! This job is still ahead of me and will involve the same steps; paint, seals, hardware, canvas. Ours will be complicated by the lack of the truck and the fact that my sewing bride is determined to make her own replacement tent. |
|
| Back to top |
|
|
SL1
Samba Member

Joined: December 17, 2010
Posts: 251
Location: Nova Scotia, Canada
|
| Posted: Sat Feb 12, 2011 4:49 am Post subject: |
|
|
NICE WORK
some great tips for those little extras the set it off from stock. I too am ordering a tent from 'atelierspk'
thanks for the post 
_________________
Steve
1985 GL Westy - 'Bullwinkle'
1978 Super Beetle - 'Rocky' |
|
| Back to top |
|
|
supersooner
Samba Member
Joined: July 27, 2005
Posts: 131
Location: At the ranch - 20 miles east of Oklahoma City
|
| Posted: Sat Feb 12, 2011 5:43 am Post subject: |
|
|
| Thanks. My tent is getting kinda ratty and has a few mended tears, so, I'll be referring back to this post when I do the replacement. |
|
| Back to top |
|
|
j_dirge
Samba Member

Joined: August 08, 2007
Posts: 4641
Location: Twain Harte, CA
|
| Posted: Sat Feb 12, 2011 8:32 am Post subject: |
|
|
Beautiful!
I really like the idea of coating the interior of the luggage rack
<adding it to the list>
_________________
-89 GL Westy, SVX.. finally.
-57 pan f/g buggy with a 67 pancake Type 3 "S"
"Jimi Hendrix owned one. Richard Nixon did not"
-Grand Tour, Season 1, episodes 4 and 5
| danfromsyr wrote: |
those are straight line runs with light weight race cars for only 1/4mile at a time..
not pushing a loaded brick up a mountain pass with a family of 4+ inside expecting to have an event free vacation..
|
|
|
| Back to top |
|
|
singler3360
Samba Member

Joined: February 25, 2009
Posts: 1191
Location: Corvallis, Oregon
|
| Posted: Sat Feb 12, 2011 9:39 am Post subject: |
|
|
| Great post. Really like the extra treatment to the bottom of the luggage rack. Did you prep and repaint the top and luggage rack yourself? |
|
| Back to top |
|
|
VanWilder
Samba Member

Joined: October 09, 2009
Posts: 1349
Location: PDX-Weird Town, USA
|
| Posted: Sat Feb 12, 2011 9:40 am Post subject: |
|
|
Did you do all this work living in an apartment building? If so then, I am really impressed. Great job my man!!! Stunning!!
_________________
VW
________________________
"83.5" Vanagon GL Air cooled "VanWilder"
VanWilder has given back to me more then I could ever put into it September 22, 2010
Malama Ka `Aina—"Respect the Land" |
|
| Back to top |
|
|
nod7
Samba Member
Joined: July 14, 2010
Posts: 160
Location: Seattle
|
| Posted: Sat Feb 12, 2011 10:14 am Post subject: |
|
|
singler3360,
Yeah, the picture of it on the tarp was taken just before I used the sanding block to scuff it up. I used a 260 grain sanding block and scuffed everything inside taped lines. Wurth Stone Guard doesn't say you need to do this but, I had them put a heavy layer of clear coat on my top when they painted it. This made it pretty smooth therefore, I figured it couldn't hurt to scuff it.
VanWilder,
Yeah, I've been doing all my project work from the apartment. Of course, some project parts I've paid others to do. Like painting the top. I took it back to the same people who painted the Dawn Treader originally; http://www.thesamba.com/vw/forum/viewtopic.php?t=433581&highlight=rust+bucket
I was going to do it myself on my covered back porch. I figured I'd just line the whole porch with cheap tarps from Harbor Freight and have myself a paint shop! I've already lined one of the corners with news paper and used it for a paint booth. But, in the end, I figured it was best to have the pro's do it.
-nod7
_________________
My Projects
Propane Rework & Rust Prevention
Pop Top & Tent Restoration
House Battery, Yandina, Xantrex & Atwood Install |
|
| Back to top |
|
|
DAIZEE
Samba Member
Joined: January 26, 2010
Posts: 7552
Location: Greater Toronto Area Ontario West Side
|
| Posted: Sat Feb 12, 2011 2:16 pm Post subject: |
|
|
SUPERB! Great Job. Wish I could get my luggage rack off but its an ASI so it doesn't come off without taking the top off. GREAT
_________________
'09 2.5L Jetta 5 cylinder, 5 spd, super turbo, see thread in H2O Cooled Jetta, etc...
83.5 Vanagon L Riviera Model with 98 1.9L TD AAZ 4 speed Daily Driver 3 out of 4 seasons (sold)
84 Vanagon GL Wolfsburg Westy WBX 4 speed (sold) |
|
| Back to top |
|
|
b00t
Samba Member

Joined: February 08, 2011
Posts: 157
Location: Asheville, NC
|
| Posted: Tue Mar 01, 2011 12:01 pm Post subject: |
|
|
Nice write up, makes it look easy...easyish maybe. Well worth the work, how about that. It Looks Great.
Question, what is the rolled up bit at the top of you poptop? Is that part of the aftermarket top? |
|
| Back to top |
|
|
mariusstrom
Samba Member
Joined: March 29, 2010
Posts: 745
|
| Posted: Tue Mar 01, 2011 11:52 pm Post subject: |
|
|
| b00t wrote: |
Nice write up, makes it look easy...easyish maybe. Well worth the work, how about that. It Looks Great.
Question, what is the rolled up bit at the top of you poptop? Is that part of the aftermarket top? |
The rolled up bit is the rainfly from the tent company. |
|
| Back to top |
|
|
rockfish
Samba Member
Joined: February 13, 2007
Posts: 740
Location: Palo Alto, Calif.
|
| Posted: Wed Mar 02, 2011 1:41 pm Post subject: |
|
|
| j_dirge wrote: |
Beautiful!
I really like the idea of coating the interior of the luggage rack
<adding it to the list> |
2x.
I have some cracking in one corner of my luggage rack - I think I'll patch and then follow your example.
My only note of caution is on the drain screens. I found them to be more of a PITA than helpful...as they always clogged. We have flowering trees in our front yard (non-fruiting or Bradford Pear Tree) and the blossoms do an excellent job of clogging things up. I realized it was easier (for me) to remove the luggage rack each Spring and clean out underneath. YMMV.
_________________
89 Westy
GW 2.5 5-speed trans
"It's what you learn after you know it all that counts."
- John Wooden |
|
| Back to top |
|
|
DAIZEE
Samba Member
Joined: January 26, 2010
Posts: 7552
Location: Greater Toronto Area Ontario West Side
|
| Posted: Wed Mar 02, 2011 3:46 pm Post subject: |
|
|
Having a Riviera it is not easy to take off my luggage rack. When I was cleaning off the years of rooted mold, I used the hose on high pressure and put it to the holes. Lots came out, I'm sure there might be more but I pumped lots of Super Tuff in and rinsed it as mentionned until everything ran clear. Actually if I could take it off easily, I'd leave it off and use luggage bag which is my intent anyway.
Nod: I've been thinking how you could have done the removal without scratching the back. Best way of course is to have at the least a 2nd person, another way might be to tape thick sponge/cloth or something like that around the forward edge of the top for when removing. I know it is too late now for you but anyone doing this independantly like you did should consider it or maybe using some swimming noodles. Another way would be rigging a pulley system to the forward end (some underground parking spots have pretty heavy pipes)
Still a very big good/excellent job. 
_________________
'09 2.5L Jetta 5 cylinder, 5 spd, super turbo, see thread in H2O Cooled Jetta, etc...
83.5 Vanagon L Riviera Model with 98 1.9L TD AAZ 4 speed Daily Driver 3 out of 4 seasons (sold)
84 Vanagon GL Wolfsburg Westy WBX 4 speed (sold) |
|
| Back to top |
|
|
nod7
Samba Member
Joined: July 14, 2010
Posts: 160
Location: Seattle
|
|
| Back to top |
|
|
|


